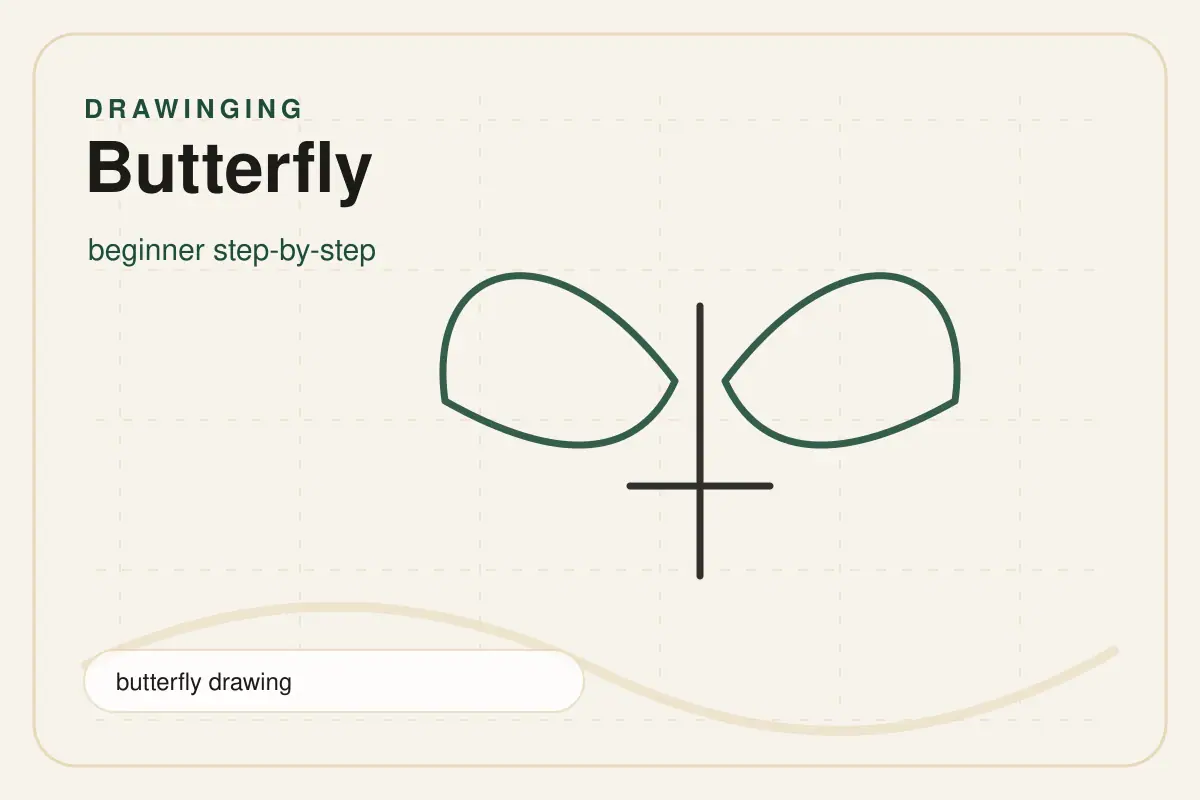
It is easier to learn butterfly drawing when you separate the insect into three decisions: a straight center, balanced wing shapes, and simple pattern placement.
This beginner lesson starts with a body axis, builds matching upper and lower wings, and then adds sections, spots, antennae, shading, and color ideas. Focus on symmetry first. Decoration becomes much simpler when the silhouette is already working.
Butterfly Drawing Tutorial Overview
- Difficulty: Beginner
- Estimated time: 25-35 minutes
- Number of steps: 9
- Main medium: Graphite pencil
- Worksheet: Free printable PDF available
- Main skills: Symmetry, mirrored curves, wing sections, pattern spacing, line weight, and color planning
What You Will Learn
This lesson shows how to draw a butterfly with a simple vertical guideline, a slim segmented body, and paired wings that feel balanced from side to side. You will compare upper wing corners, lower wing tips, and the empty space around the insect.
You will also divide wings into sections before adding decorative spots or bands. That order prevents adding detailed patterns to uneven wings.
Materials Needed
HB pencil
Use an HB pencil for the center guideline, body shapes, wing outlines, and internal sections.
2B pencil
A 2B pencil creates darker borders, body shadows, antennae, and selected pattern bands.
Eraser
Use a clean eraser to remove the guideline and soften curves that need correction.
Drawing paper
Smooth drawing paper helps with long curves; printer paper also works for practice.
Black fineliner
A fineliner is optional for bold outlines after the pencil sketch is finished.
Colored pencils
Colored pencils are useful for orange, yellow, blue, purple, black, white, or layered patterns.
Before You Start
Place the center guideline in the middle of the page and leave wide space on both sides. Open wings need more room than the body suggests.
Draw lightly until the wing silhouette is correct. If one wing is too wide, too tall, or angled differently, fix it before adding spots.
Compare landmarks as you go: upper outside corner to upper outside corner, lower tip to lower tip, and left border to right border.
If mirrored curves are difficult, review basic shapes and proportions before adding decoration.
Step-by-Step Butterfly Drawing
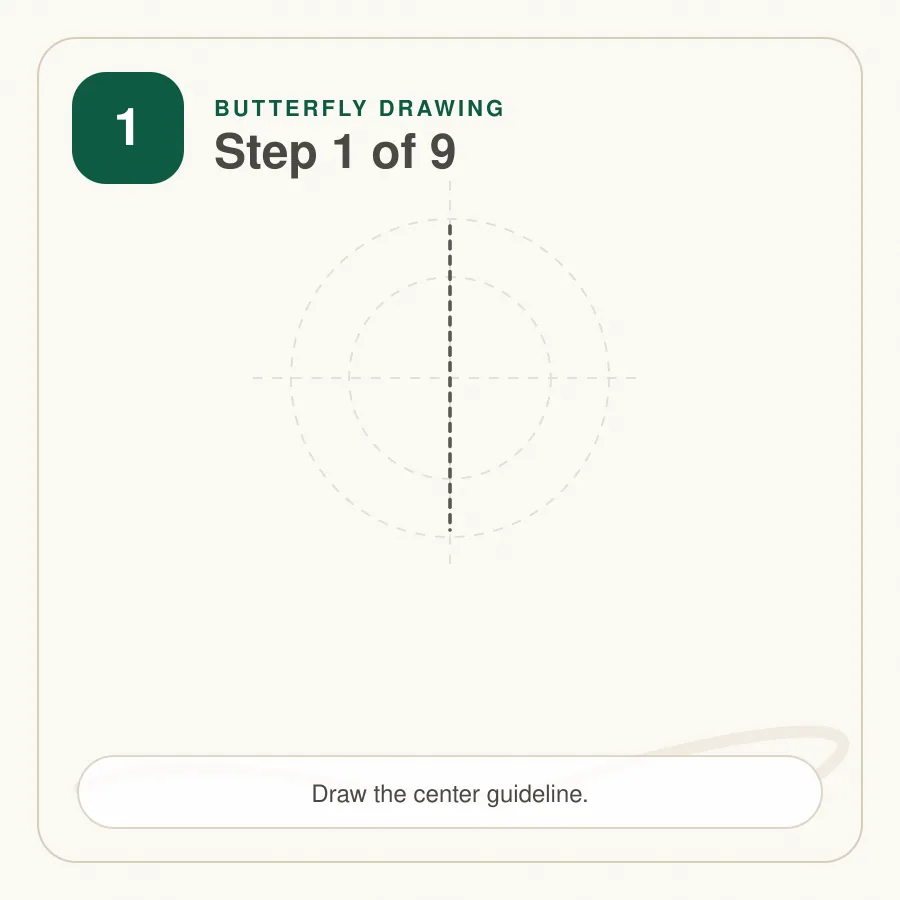
Step 1: Draw the Center Guideline
Start with a light vertical line down the middle of the page. This guide will keep the body centered and help you compare the left and right wings.
Make the line longer than the body so there is room for both the upper and lower wings.
Tip: Use very light pressure because the guideline will be erased later.
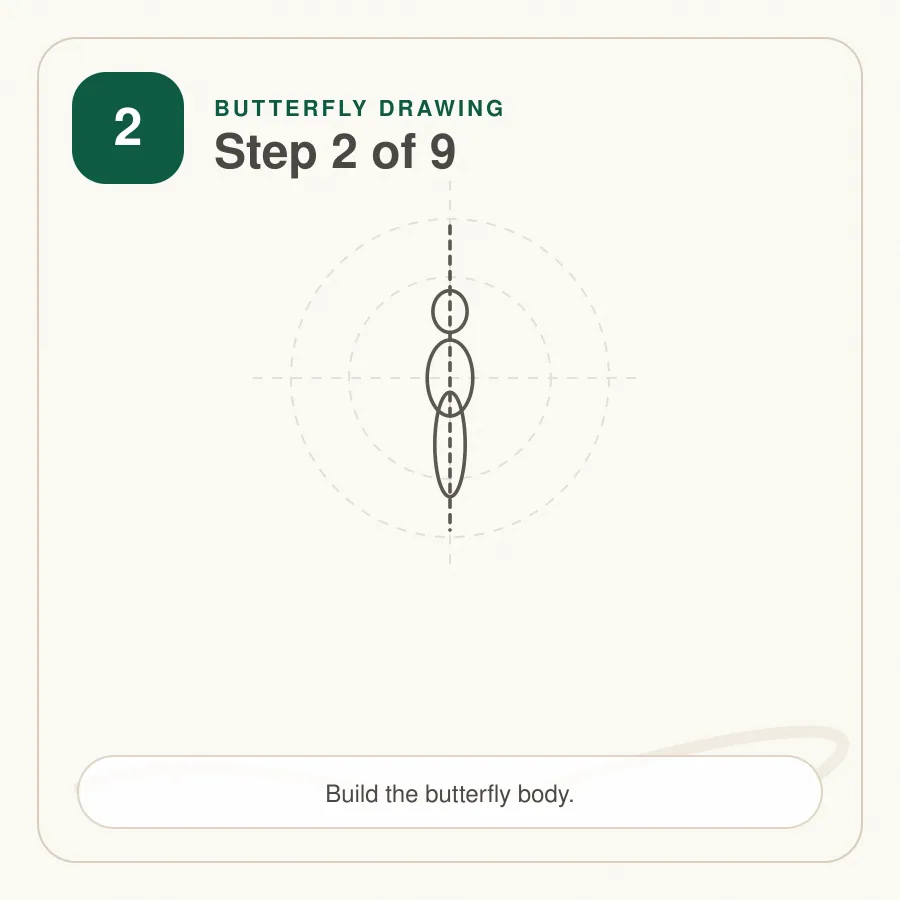
Step 2: Sketch the Body
Draw a small head near the top of the guideline, a rounded thorax below it, and a longer tapered abdomen underneath.
Keep the body slim so the wings remain the main feature. The body should sit evenly on the centerline.
Tip: Think of the body as three simple connected shapes.
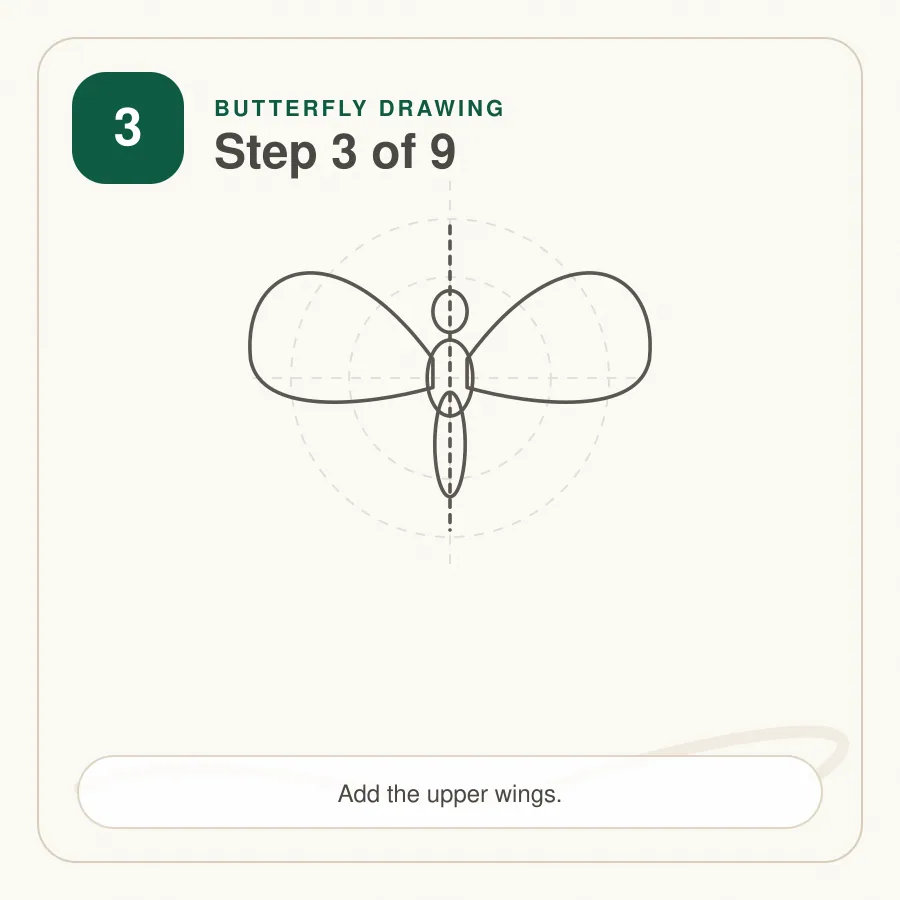
Step 3: Add the Upper Wings
From the upper body, draw two large wing shapes that sweep outward and upward before curving back toward the middle.
Match the height and width on both sides as closely as you can. Keep the curves broad and graceful.
Tip: Mark the outer corners lightly before connecting the curves.
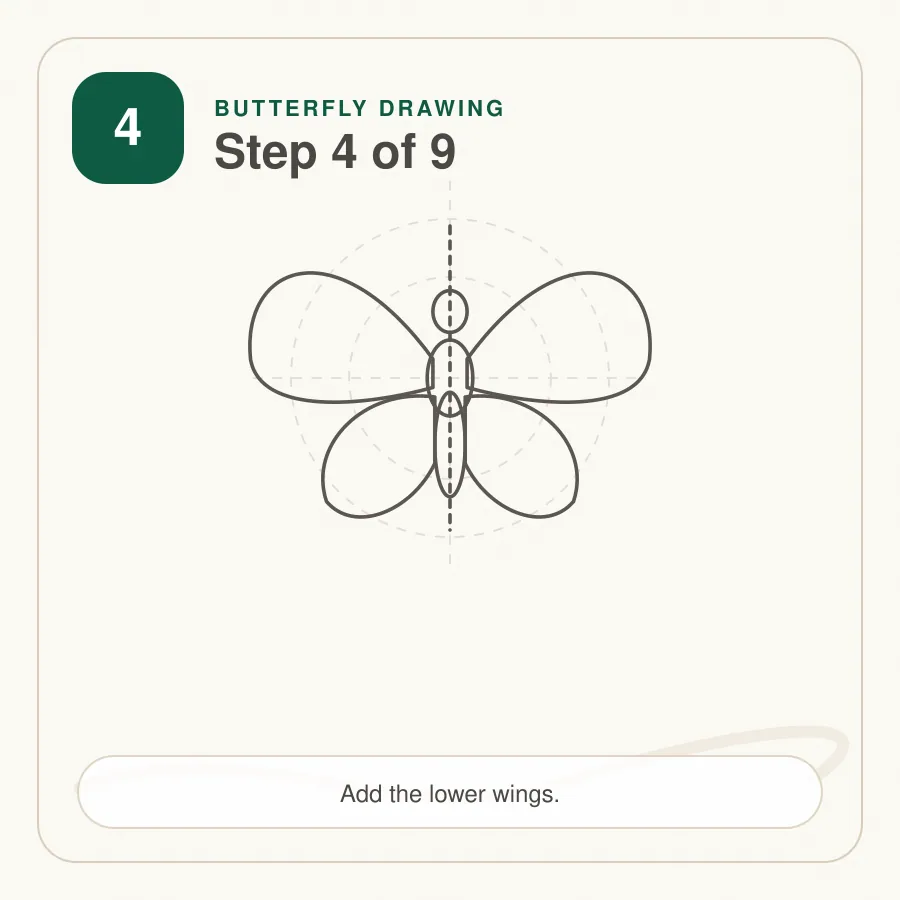
Step 4: Add the Lower Wings
Under the upper wings, draw two smaller rounded wing shapes. Let them tuck beneath the larger wings and return toward the lower body.
The lower wings should feel related to the upper wings but not as wide or tall.
Tip: Check that both lower tips end at a similar height.
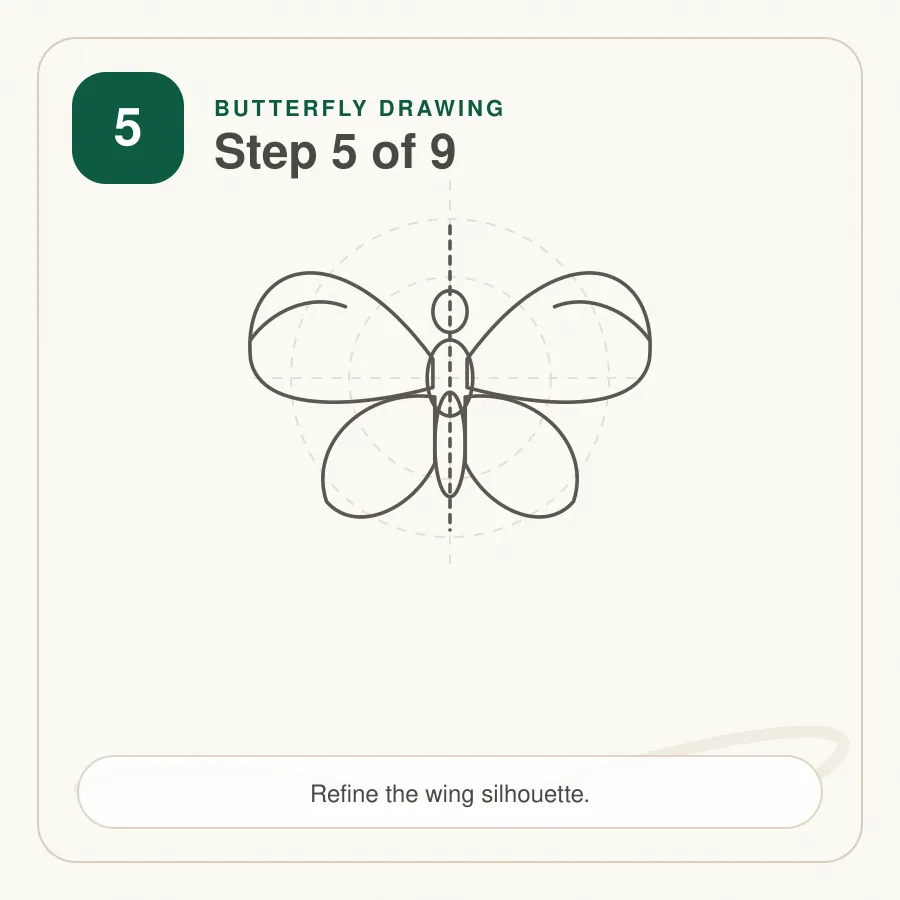
Step 5: Refine the Wing Silhouette
Review the full outline from left wingtip to right wingtip. Smooth uneven curves, adjust corners that feel too sharp, and make sure both upper wings have similar volume.
Lightly erase extra construction marks as the silhouette becomes clearer.
Tip: Step back and compare the empty space around both wings.
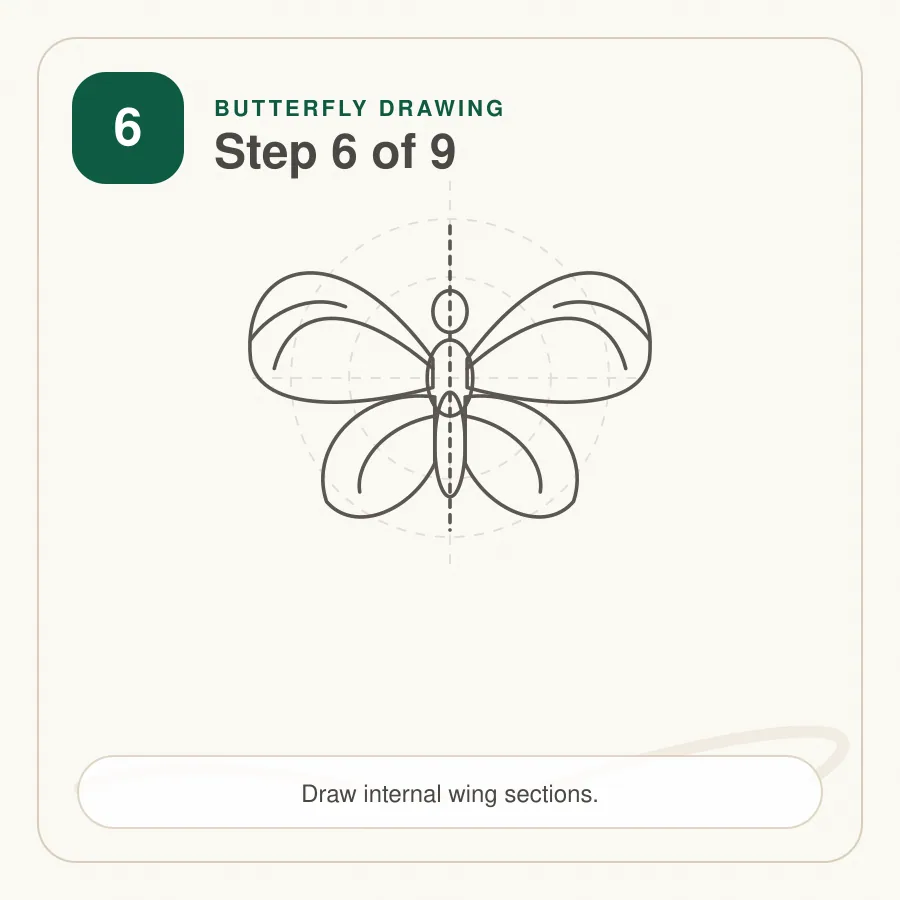
Step 6: Divide the Wings Into Sections
Add gentle internal lines that radiate from the body toward the wing edges. These sections guide the later patterns and help the wings feel structured.
Keep the lines light and repeat similar angles on both sides.
Tip: Internal sections should support the wing shape, not cut it into random pieces.
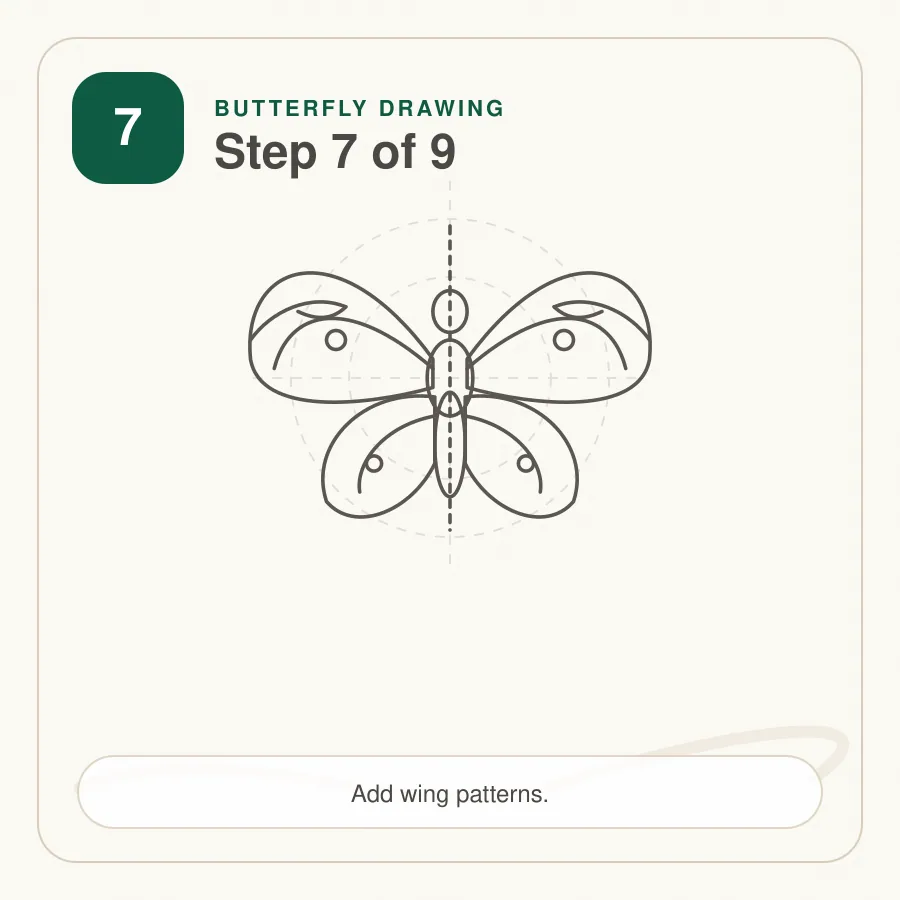
Step 7: Add Wing Patterns
Draw border bands, rounded spots, or simple stripes inside the wing sections. Place matching pattern ideas in similar areas on the left and right wings.
The shapes can vary slightly, but their size and spacing should feel balanced.
Tip: Add fewer patterns than you think you need; clean spacing looks better.
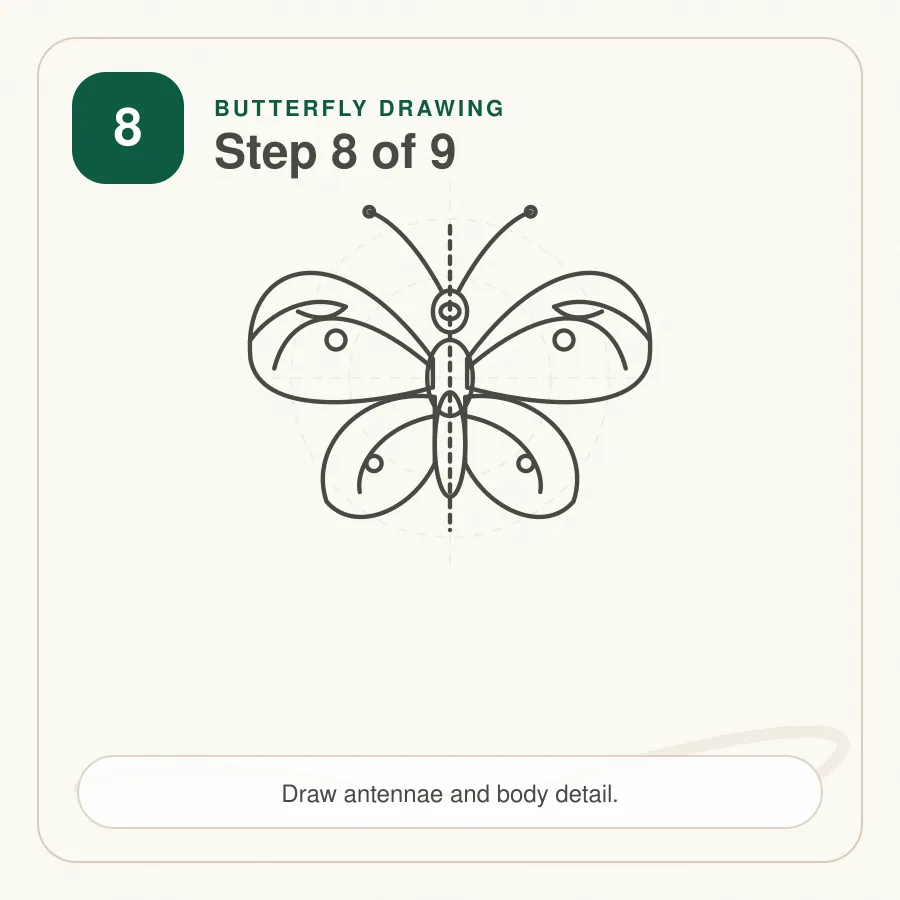
Step 8: Draw the Antennae and Body Details
Add two curved antennae from the head, ending with small rounded tips. Draw a few short body segments across the thorax and abdomen.
Keep these marks softer than the wing outline so the body does not become too heavy.
Tip: Curve both antennae outward with a similar rhythm.
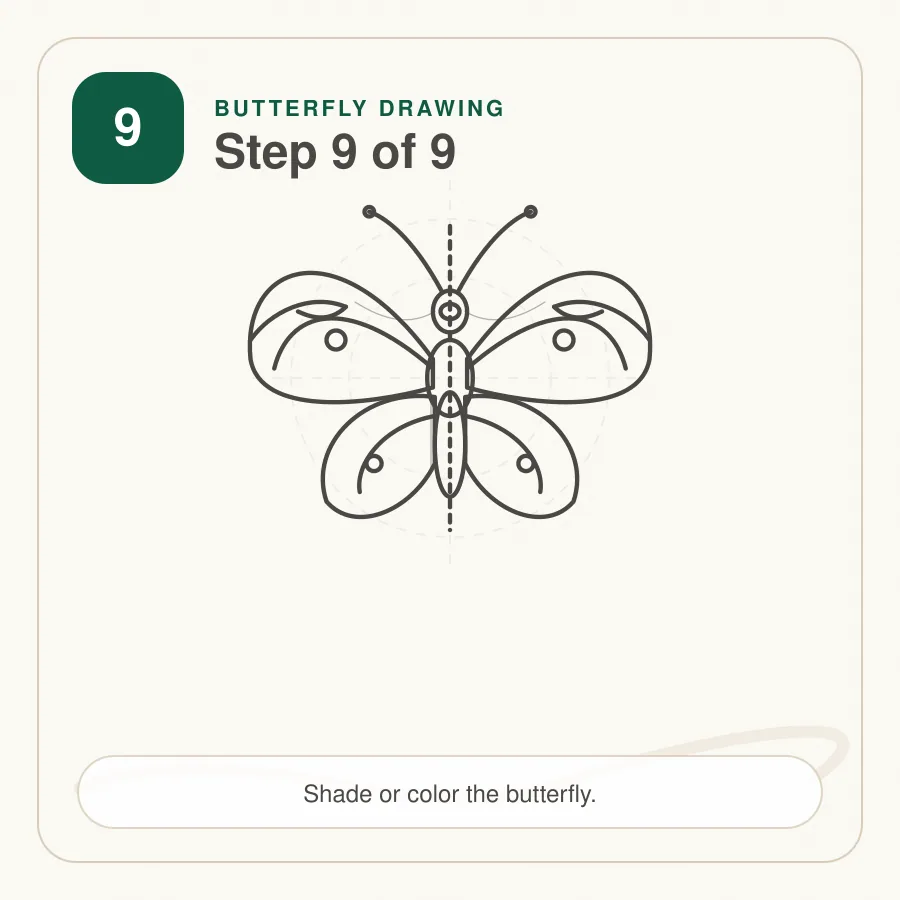
Step 9: Add Shading or Color
Choose a light direction, then shade near the body, along lower wing overlaps, and inside selected pattern bands.
For color, apply pale layers first, then strengthen the borders, spots, and body accents. Preserve a few light areas for contrast.
Tip: Keep matching colors and values similar on both wings.
How to Refine the Final Drawing
Check the outer silhouette before working on small decoration. The upper wings should feel broad, while the lower wings should sit beneath them with a smaller curve.
Erase the center guideline where it crosses finished body details. Remove extra construction marks and redraw uneven curves with lighter pressure.
Use darker line weight near the body and on selected outer borders. Keep some internal section lines lighter so the patterns do not look too heavy.
Shading and Coloring the Butterfly
Decide where the light comes from before shading. Add darker values near the body, under overlapping wing sections, and inside selected pattern bands.
For colored pencil, start with the lightest wing color first. Add stronger color near the borders and body, then deepen spots or stripes last.
If your curves feel shaky, practise with the line control guide. For softer value changes, use the shading guide.
Simple Butterfly Drawing Variation
For a quick version, draw only a narrow body, two large upper wings, two smaller lower wings, and curved antennae.
Add one border line and three rounded spots on each side. Skip the internal veins and keep the outline smooth.
Monarch Butterfly Drawing Variation
To suggest a monarch, use dark borders around the wings and divide the interior into long sections that radiate from the body. Add small pale spots along the outer border.
Orange works well inside the sections, with black or dark brown around the edges. Keep the pattern balanced.
Small Cute Butterfly Variation
For a cute version, make the body shorter and the wings rounder. Draw larger eyes, soft antennae, and only a few heart-shaped or circular spots.
Use gentle colors and simple outlines so the insect stays light.
Colorful Butterfly Drawing Ideas
Try a blue and purple wing set with dark borders, a yellow and orange sunset palette, or pale pink wings with small white spots. You can also make each section a slightly different color while keeping both sides matched.
When using strong color, leave a few highlights so the pattern reads clearly.
Butterfly Wing Pattern Ideas
Begin with easy patterns before trying complex ones. Good beginner options include border bands, rows of dots, long teardrop sections, scalloped edges, and simple stripes.
Repeat the same idea on both wings so the insect remains balanced.
Common Butterfly Drawing Mistakes
Decorating before the silhouette is correct
Patterns cannot fix uneven wings. Balance the outer shape first.
Making one upper wing much larger
Compare the outer corners before drawing details. A small correction early saves time later.
Oversizing the lower wings
Lower wings should usually be smaller than the upper wings in this beginner pose.
Moving the body off center
Keep the thorax and abdomen on the vertical guide until both sides are placed.
Drawing stiff antennae
Use smooth curves so the antennae feel light and natural.
Filling every section
Quiet spaces help the patterns stand out. Leave some areas simple.
Tips for Drawing Butterflies for Beginners
- Start with a vertical centerline.
- Build the body before the wings.
- Mark wing corners before drawing long curves.
- Keep the upper wings larger than the lower wings.
- Add internal sections before spots or stripes.
- Repeat pattern placement on both sides.
- Shade and color lightly at first.
For related nature subjects, try the flower tutorial, rose tutorial, sunflower tutorial, bee tutorial, or bird tutorial. You can also browse more insect drawing tutorials.
Download the Butterfly Drawing Worksheet
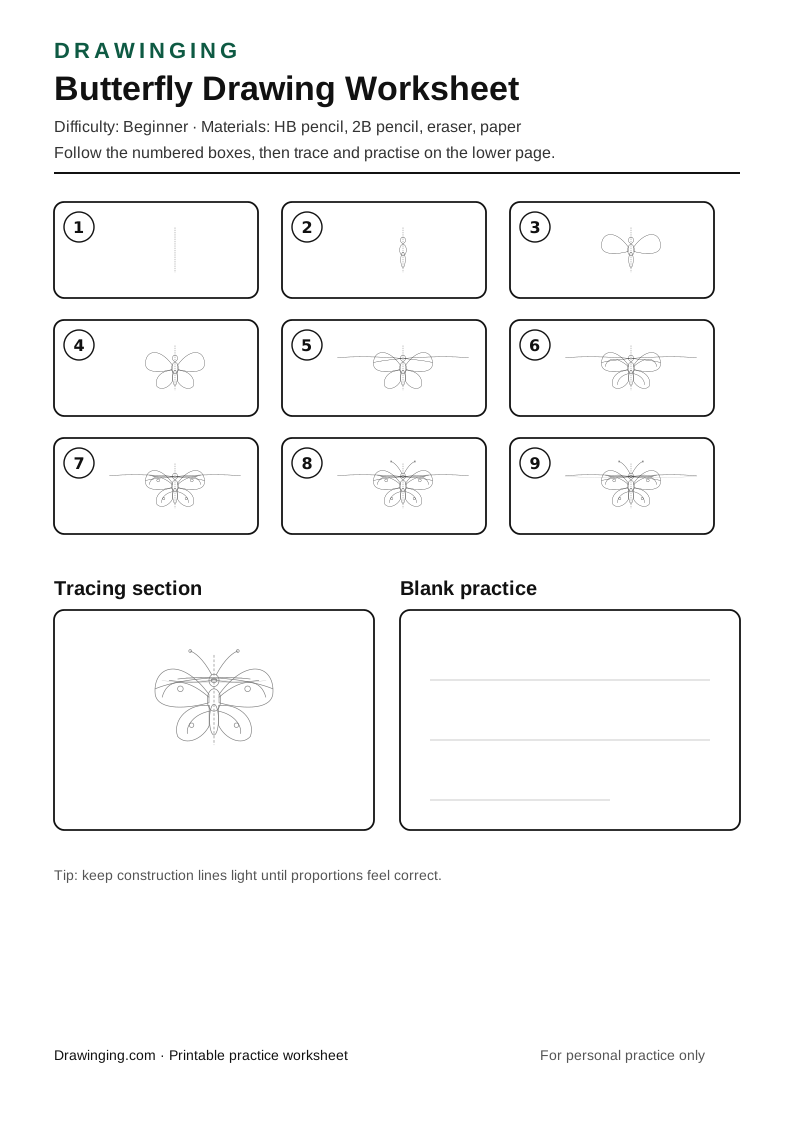
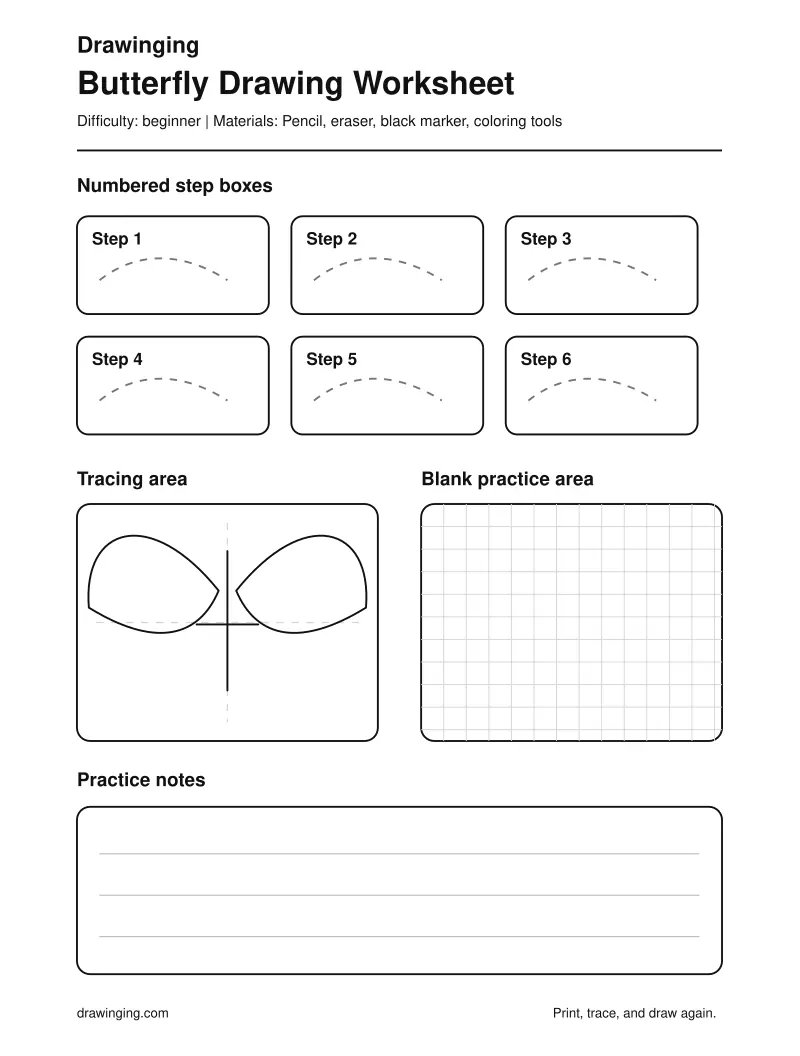
Use the printable worksheet to practise the same nine-step process on paper.
The worksheet includes:
- nine numbered step boxes
- a tracing exercise
- a blank drawing area
- a simple materials reminder
- a finished butterfly reference
- printer-friendly black lines
Download the Butterfly Drawing Worksheet PDF
Related Drawing Tutorials
After completing this lesson, continue with these related tutorials:
- Draw a simple flower
- Practise a rose with layered petals
- Try a sunflower beside the wings
- Sketch a bee for another insect study
- Draw a bird with simple shapes
- Explore more insect tutorials
Frequently Asked Questions
What is the easiest way to start drawing a butterfly?
Start with a light vertical center guideline, then add the body and mirror the upper and lower wings on both sides before drawing patterns.
How do I make butterfly wings even?
Compare the outer corners, lower tips, and empty space on both sides of the body. Sketch lightly and adjust the silhouette before adding patterns.
Which pencil should I use for butterfly wings?
Use an HB pencil for the centerline and wing construction. Use a 2B pencil for final outlines, dark pattern bands, body shadows, and antennae.
How can I draw a monarch butterfly pattern?
Divide each wing into sections, add dark outer borders, then place rounded pale spots along the edges and vein-like bands inside the wings.
Can beginners color the butterfly?
Yes. Start with light color layers, keep both wings balanced, and add the darkest colors last around the body, borders, and pattern bands.
Can I print the butterfly worksheet?
Yes. The worksheet includes nine step boxes, tracing space, and a blank area for practising balanced wings and patterns.
Final Thoughts
A balanced butterfly drawing begins with a center guideline and patient wing comparison. Build the body first, mirror the wings, and wait to add patterns until the silhouette feels right.
Use the worksheet to repeat the nine steps, then try a monarch, colorful version, or small cute variation. Each repeat will improve your control over symmetry, curves, pattern spacing, and light shading.