A rose drawing becomes easier when you build the bloom from the center outward. This tutorial begins with a small inner center, wraps folded petals around it, expands into outer petals, then adds sepals, stem, leaves, clean outline, and soft shading or color.
The lesson is beginner friendly, but the layering method can also support more realistic floral studies. Work slowly, keep construction lines light, and decide which petals sit in front before darkening the final edges.
Rose Drawing Tutorial Overview
- Difficulty: Beginner
- Estimated time: 30-45 minutes
- Number of steps: 10
- Main medium: Graphite pencil
- Worksheet: Free printable PDF available
- Main skills: Layered petals, overlap, stem placement, leaf structure, line weight, shading, and color
What You Will Learn
This lesson shows how to turn a tight flower center into a full bloom. You will draw the inner center, wrap the first folded petals around it, build a middle ring, and add larger outer petals that open naturally.
You will also practise sepals, a curved stem, simple leaves, clean line work, and shaded petal folds. The result is a rose drawing that can stay as pencil line art or become a colored floral study.
Materials Needed
You can finish the lesson with simple tools.
HB pencil
Use an HB pencil for light construction lines, petal rings, stem placement, and leaves.
2B pencil
A 2B pencil creates darker overlap shadows, petal bases, and final line weight.
Kneaded eraser
A kneaded eraser lifts graphite from petal highlights without roughening the paper.
Drawing paper
Smooth drawing paper makes the curved petal edges easier to control.
Black fineliner
A fineliner is optional. Use it only after the pencil structure is correct.
Colored pencils
Colored pencils can create red, pink, cream, or white flower variations with layered values.
Before You Start
Place the bloom slightly above the center of the page so there is room for the stem and leaves. A rose head needs space around it because the outer petals can spread wider than expected.
Keep early lines light. Petal overlaps often need adjustment, and heavy construction marks can make the final flower look crowded.
Think in layers: inner fold, first petals, middle ring, outer petals, then plant details. This simple order prevents the bloom from becoming a confusing cluster of curves.
Step-by-Step Rose Drawing
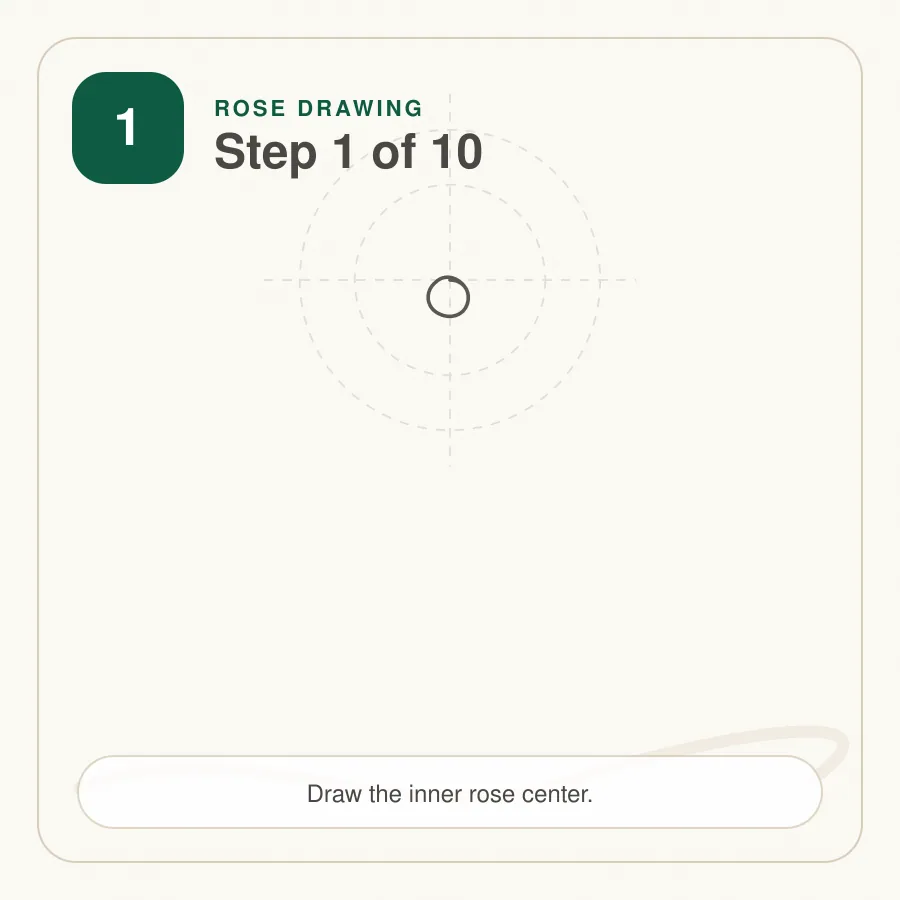
Step 1: Draw the Inner Center
Begin with a small oval or curled shape near the upper middle of the page. This inner center controls the direction of every petal that wraps around it.
Do not make the center too large. A small start leaves room for the middle and outer petal rings.
Tip: Keep the center small so there is room for petal layers.
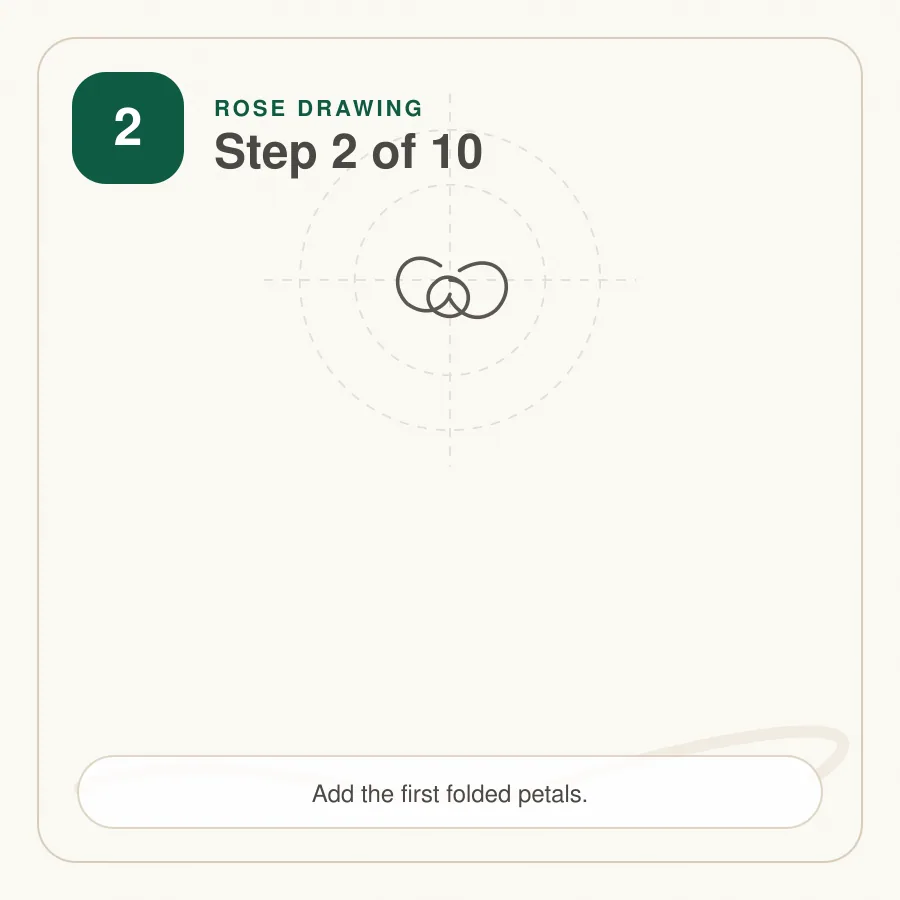
Step 2: Add the First Folded Petals
Wrap two or three short folded petals around the center. Let their edges overlap and curve inward so the bloom begins to look cupped.
These first petals should feel tight. They are the core of the flower and should not spread too far outward yet.
Tip: Small folded petals make the center feel tight and natural.
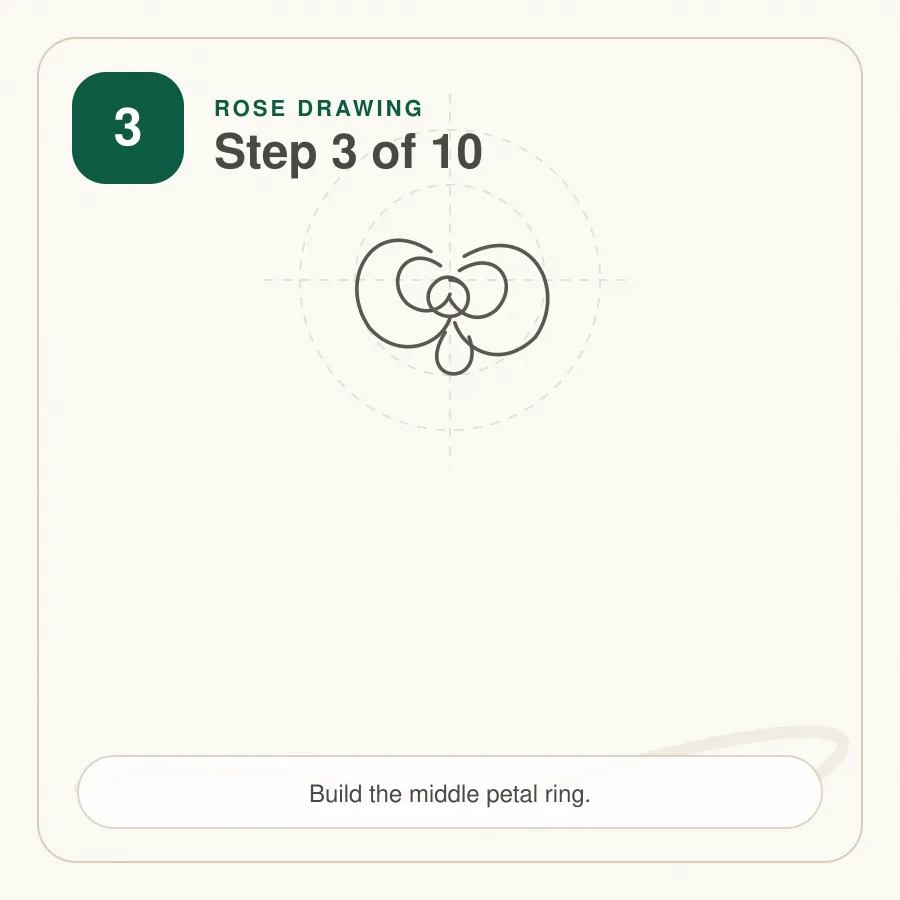
Step 3: Build the Middle Ring
Add a ring of wider petals around the first folds. Each petal should tuck partly behind a neighbor and point in a slightly different direction.
Work one overlap at a time. If every line is drawn at once, it becomes difficult to see which petal sits on top.
Tip: Overlap one petal edge at a time to avoid confusion.
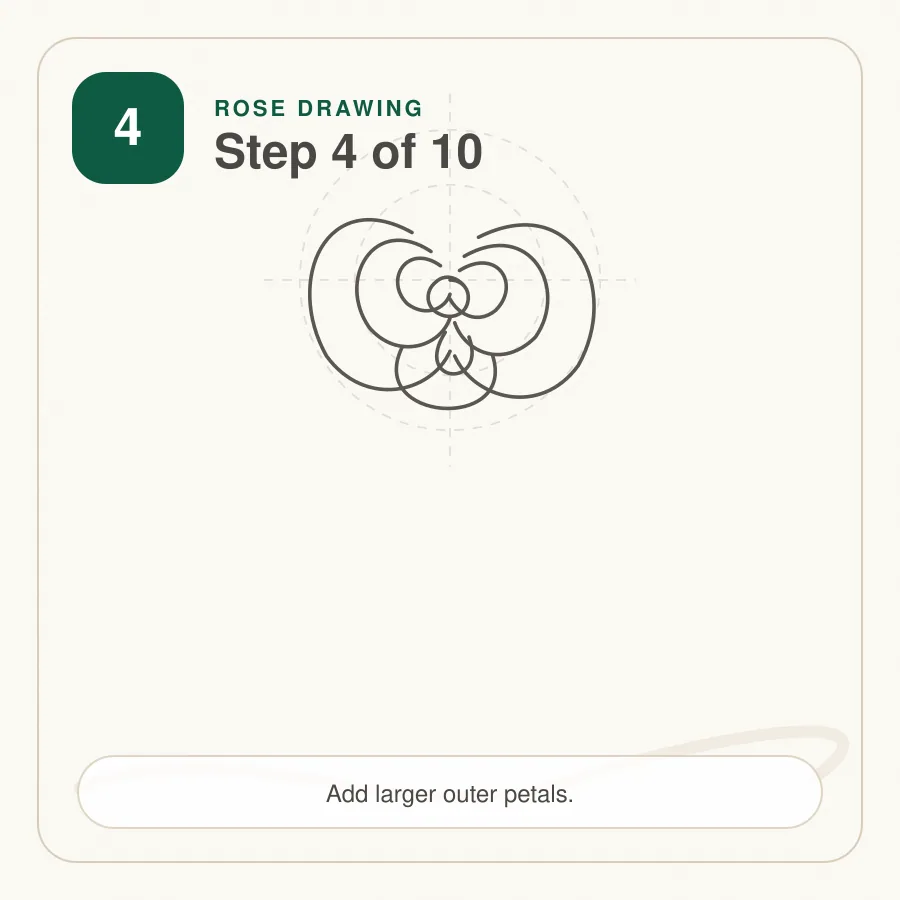
Step 4: Draw the Outer Petals
Add larger outer petals that open away from the center. Make some edges rounded and others gently pointed so the silhouette does not look rigid.
Outer petals can bend, dip, or curl outward. Variation makes the flower feel natural without losing the layered structure.
Tip: Outer petals can be wider and looser than the center petals.
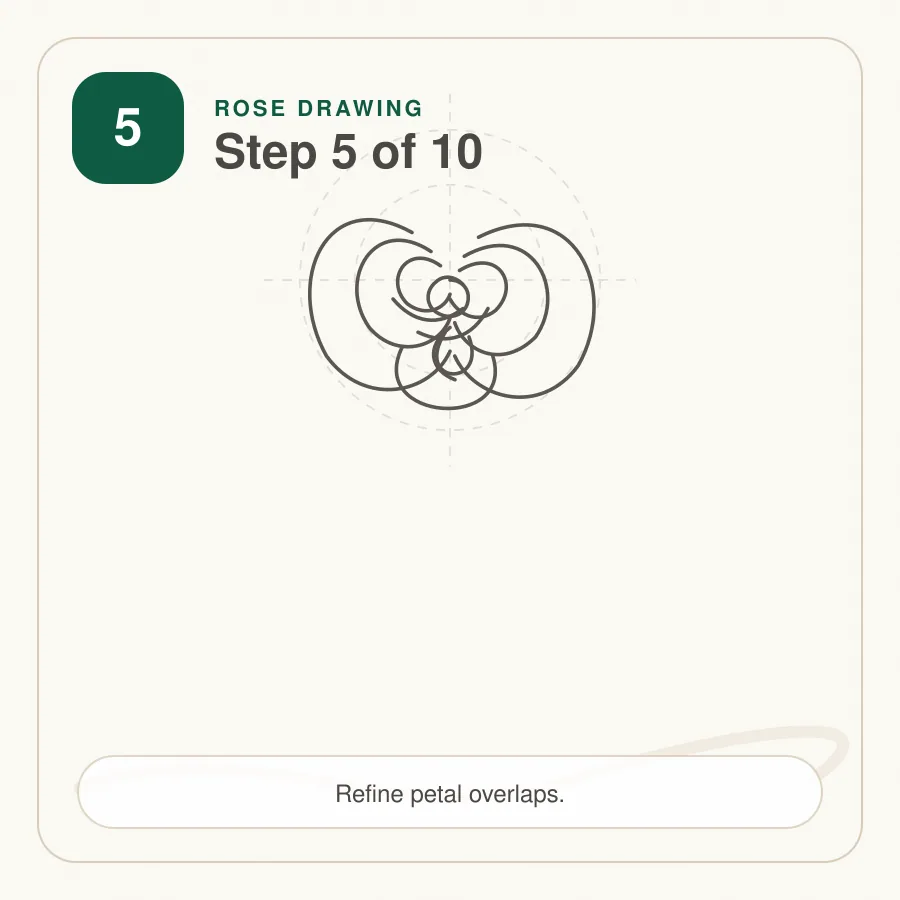
Step 5: Refine the Overlaps
Clean the petal edges and decide which layers sit in front. Erase hidden lines and darken only the edges where one petal covers another.
This stage is where the bloom becomes readable. A few clear overlaps are better than many extra petals with unclear edges.
Tip: Clear overlaps are more important than drawing many extra petals.
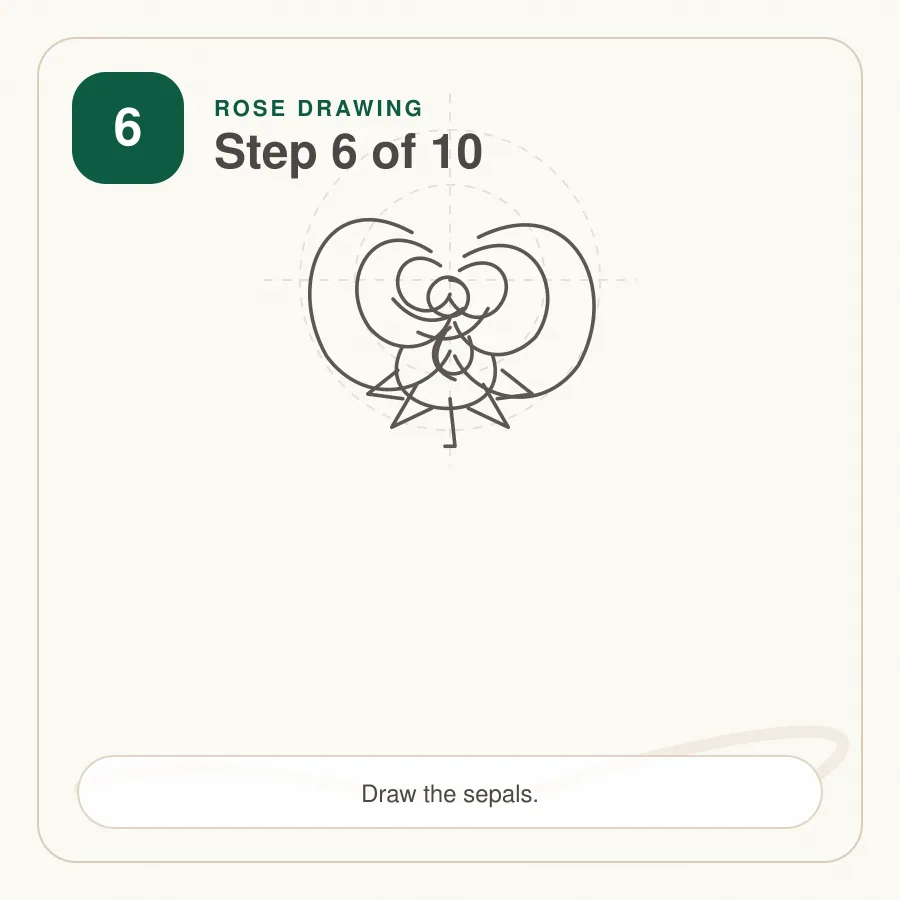
Step 6: Add the Sepals
Draw small pointed sepals beneath the bloom. Angle them outward from the base so they support the flower head without covering the petals.
Sepals should connect under the petal cup. Keep them narrower and darker than the petals so they read as supporting plant forms.
Tip: Sepals should connect directly under the bloom.
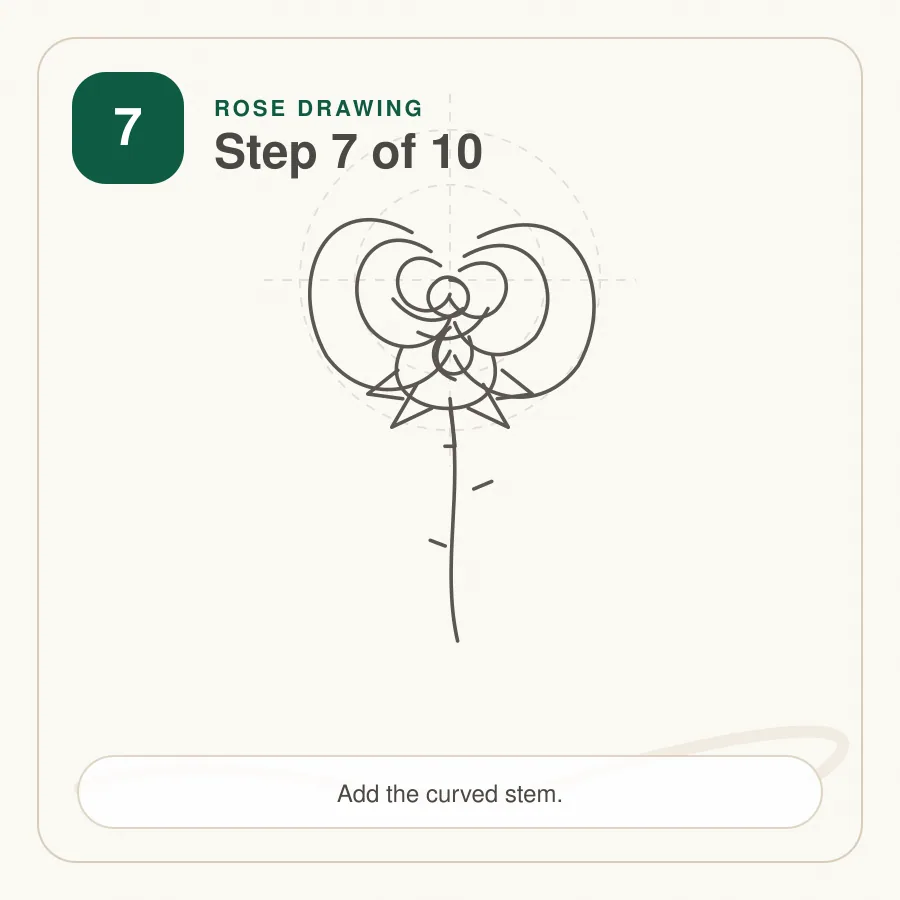
Step 7: Draw the Stem
Extend a narrow stem downward from the sepals. Give it a subtle curve so the flower feels natural rather than stiff.
The stem should visually support the bloom. If it attaches too far to one side, adjust the curve before adding leaves.
Tip: Align the stem with the weight of the bloom.
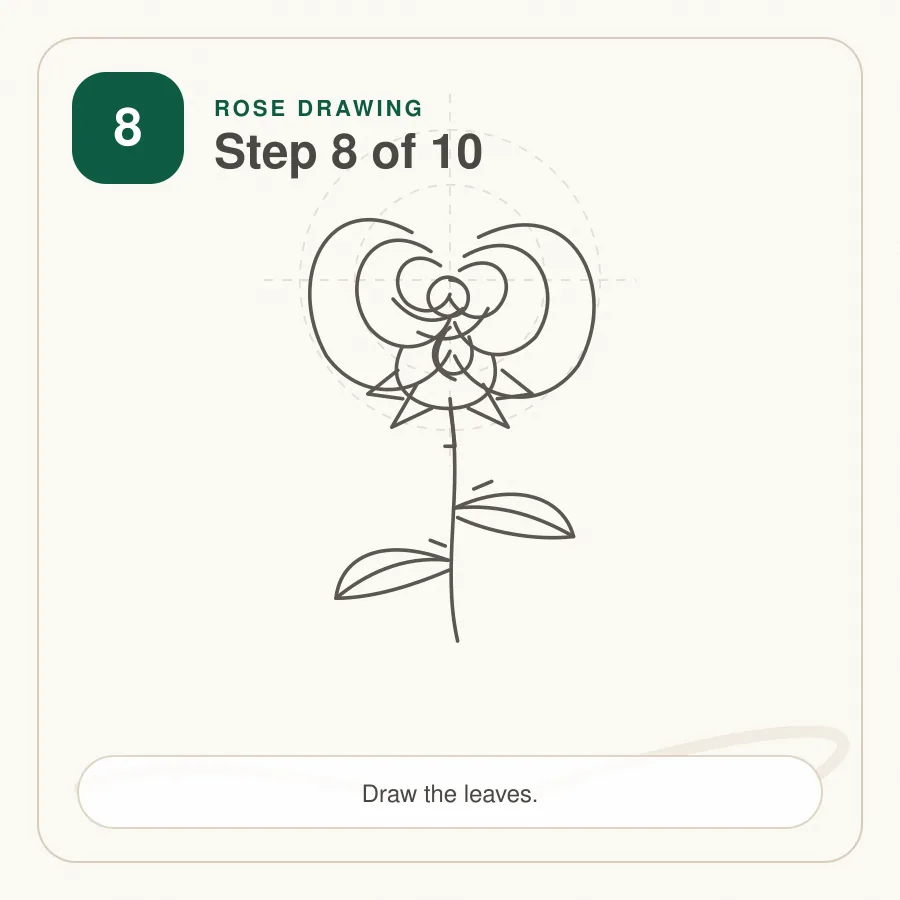
Step 8: Add the Leaves
Place one or two leaves along the stem. Use a center vein first, then draw tapered outer edges and a few light side veins.
Keep the leaves smaller than the bloom. They should balance the composition without competing with the flower head.
Tip: Leaves should support the bloom, not overpower it.
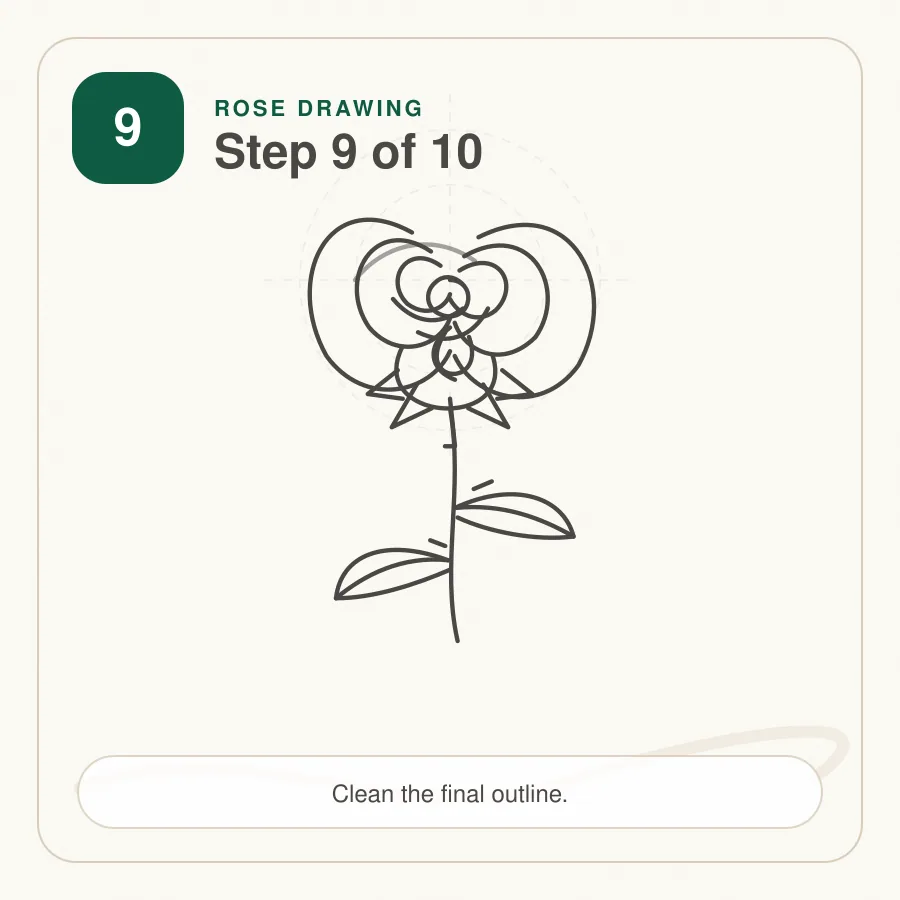
Step 9: Clean the Outline
Erase construction lines inside the bloom, stem, and leaves. Strengthen the main petal overlaps and keep the outer contour varied.
Use lighter pressure on delicate petal tips and stronger pressure where petals tuck under one another.
Tip: Use broken line weight to keep the petals delicate.
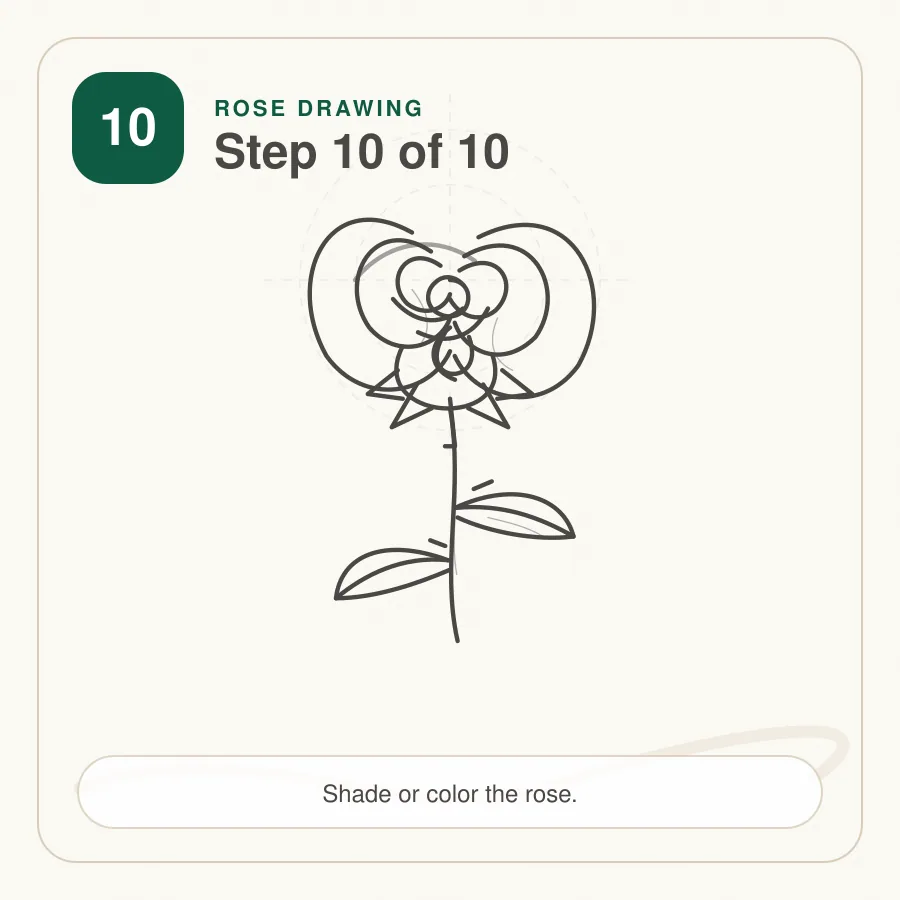
Step 10: Shade or Color the Rose
Add soft shadow at petal bases, inside folds, under sepals, and along one side of the stem. For color, layer light tones first and deepen the folds.
The finished rose drawing should keep a few bright edges so the petals do not merge into one dark shape.
Tip: Preserve highlights along curled petal edges.
Simple Rose Drawing Variation
For a quick version, draw a small oval center, three folded petals, five outer petals, one stem, and two leaves. Skip tiny veins and use one soft shadow shape inside the bloom.
This simple rose drawing variation works well for cards, notes, and beginner sketchbook practice. Keep the outer petals rounded and avoid crowding the center.
Realistic Rose Drawing Shading
Realistic shading depends on overlap. Petal bases are usually darker because they turn inward, while curled tips catch more light.
Choose one light direction before shading. Add darker graphite under folded edges, inside the center, beneath the sepals, and along the shadowed side of the stem. For more value control, review pencil shading.
Rose Outline and Line Drawing
If you want a clean outline version, complete all construction first and erase hidden lines before using a darker pencil or fineliner. Vary the contour so the petals do not look cut from paper.
Use thicker lines under overlaps and thinner lines on petal tips. This creates depth even without shading.
Small Rose Drawing
A small rose drawing needs fewer petals and clearer shapes. Use one center curl, three middle petals, and three or four outer petals. Simplify the leaves to one center vein and two side veins.
Avoid tiny texture marks when the flower is small. Strong silhouette and clean overlap will read better than miniature detail.
Red Rose and White Rose Coloring
For a red flower, begin with a pale pink or light red layer. Add deeper red near the petal bases and use a dark red or brown-red for the deepest folds.
For a white flower, do not leave everything blank. Use pale gray, cream, or light blue shadows under overlaps, then keep the brightest petal edges as clean paper.
Rose Bush and Bouquet Variations
To create a small bush, repeat the same bloom at different sizes and angles. Add shorter stems, more leaves, and a few unopened buds around the main flower.
For a bouquet, draw three blooms with crossing stems. Vary the height of each flower head and overlap the leaves to make the group feel connected.
Dead Rose Drawing Idea
For a creative wilted version, angle the bloom downward, make the outer petals droop, and curve the stem more dramatically. Use darker shading near the petal edges and let a few leaves curl.
Keep the idea floral and expressive. The same construction still applies: center, folded petals, outer petals, sepals, stem, and leaves.
How to Refine the Final Drawing
Begin by checking the bloom silhouette. The center should feel nested inside the outer petals, and the stem should support the flower from below.
Erase construction lines that run through visible petals. Clarify overlaps with darker line weight only where one petal passes in front of another.
Review basic shapes if the bloom feels unbalanced. The flower is easier to fix when you can see the cup shape, stem direction, and leaf angles as simple forms.
Shading and Coloring the Rose
Shading should follow the petal structure. Darken the bases, folds, and tucked edges, then let the graphite fade toward the tips.
Shade the sepals and one side of the stem with softer values. The leaves can have a darker center vein, but their detail should remain quieter than the bloom.
For colored pencils, apply light color first. Add stronger color in the folds and use a lighter pencil to blend toward the petal edges.
Common Rose Drawing Mistakes
Making the center too large
A large center leaves little space for the layered outer petals.
Drawing identical petals
Petals should vary in width, curve, and direction so the bloom feels natural.
Ignoring overlaps
Without clear overlaps, the flower becomes a flat group of curved lines.
Adding the stem too early
It is easier to place the stem after the bloom angle is established.
Overdarkening leaf veins
Strong leaf veins can distract from the flower head.
Shading everything evenly
Even shading removes the depth created by petal folds and highlights.
Tips for Drawing Roses for Beginners
- Start with a small center.
- Add folded petals before wide outer petals.
- Make every petal overlap at least one neighbor.
- Keep early lines light enough to erase.
- Add sepals before the stem.
- Use fewer leaf veins than you think you need.
- Repeat the rose drawing steps several times before adding complex color.
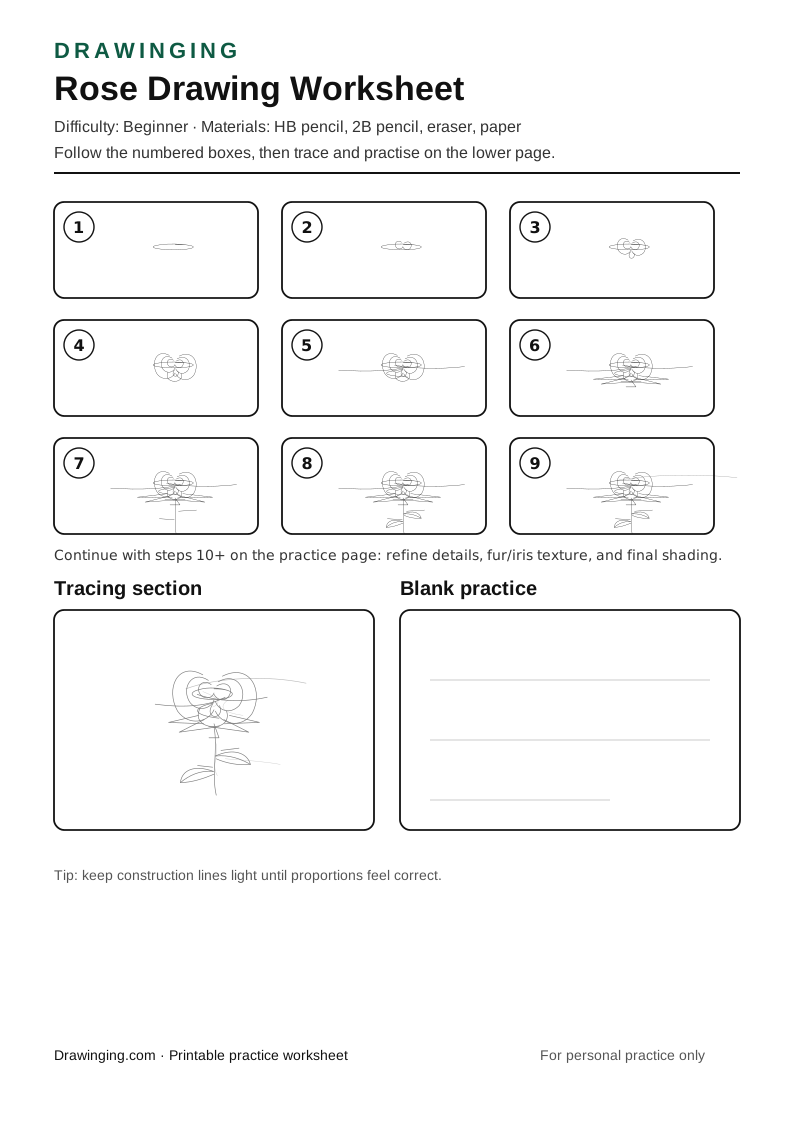
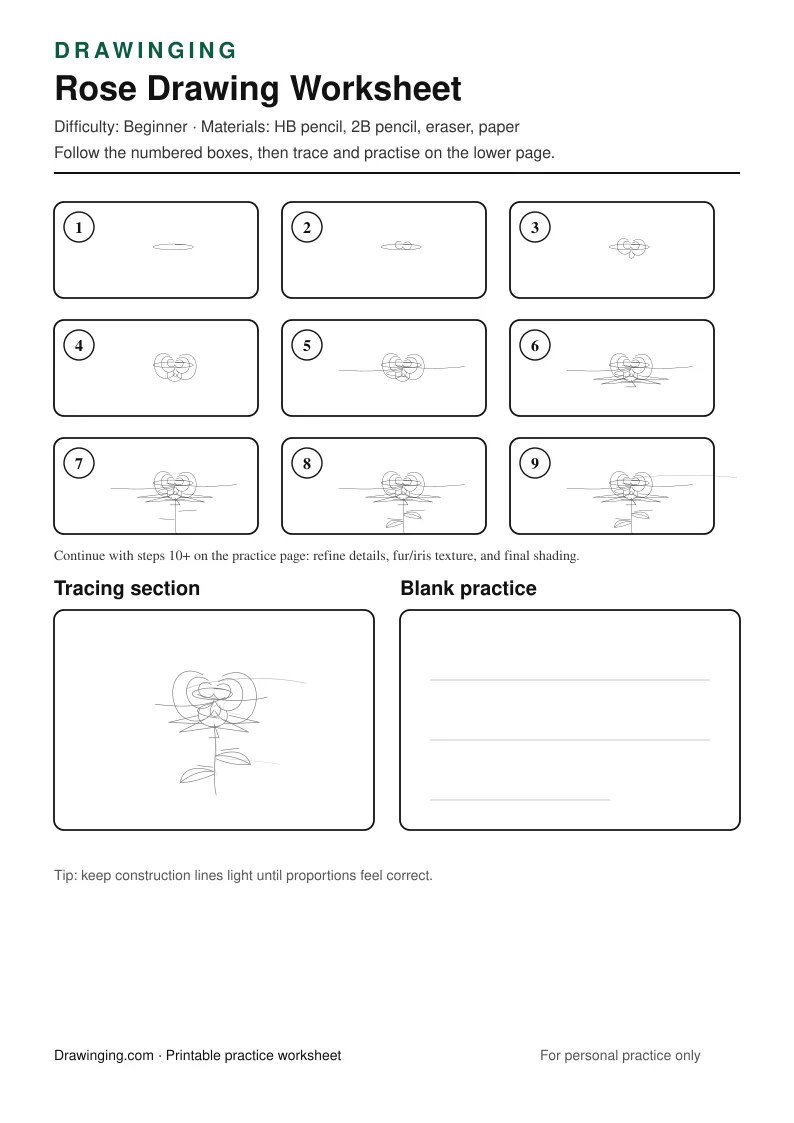
Download the Rose Drawing Worksheet
Use the printable worksheet to practise the same ten-step process on paper.
The worksheet includes:
- ten numbered step boxes
- a tracing exercise
- a blank drawing area
- a simple materials reminder
- a finished rose reference
- printer-friendly black lines
Download the Rose Drawing Worksheet PDF
Related Drawing Tutorials
After completing this lesson, continue with these floral and nature tutorials:
- Practise a simple flower first
- Draw a sunflower with bold petals
- Try a hibiscus flower
- Sketch a tulip with smooth petals
- Add a butterfly near your flower
Frequently Asked Questions
What is the easiest way to start a rose sketch?
Start with a small inner center, wrap the first folded petals around it, and build wider rings outward before drawing the stem or leaves.
How do I make rose petals look layered?
Let each petal overlap another edge. Darken the tucked areas and keep the top folds lighter so the layers are easy to read.
Should beginners draw the stem first?
It is usually easier to draw the bloom first, then place sepals and a stem that supports the finished flower head.
How do I shade a rose with pencil?
Choose one light direction, darken petal bases and overlap shadows, and fade the graphite toward the outer petal edges.
Can I color the rose red or white?
Yes. Red roses need layered dark and mid reds, while white roses depend on soft gray, cream, or pale blue shadows.
Can I print the rose worksheet?
Yes. The worksheet includes ten step boxes, tracing space, and a blank area for practising the bloom, stem, and leaves.
Final Thoughts
A convincing flower starts with layered construction, not heavy outlines. Build the center first, wrap the petals outward, then add plant details only after the bloom is clear.
Use the worksheet to repeat the process and improve your petal spacing, overlaps, line weight, and shading. Your next rose drawing can become a small bloom, a bouquet, or a carefully colored floral study.