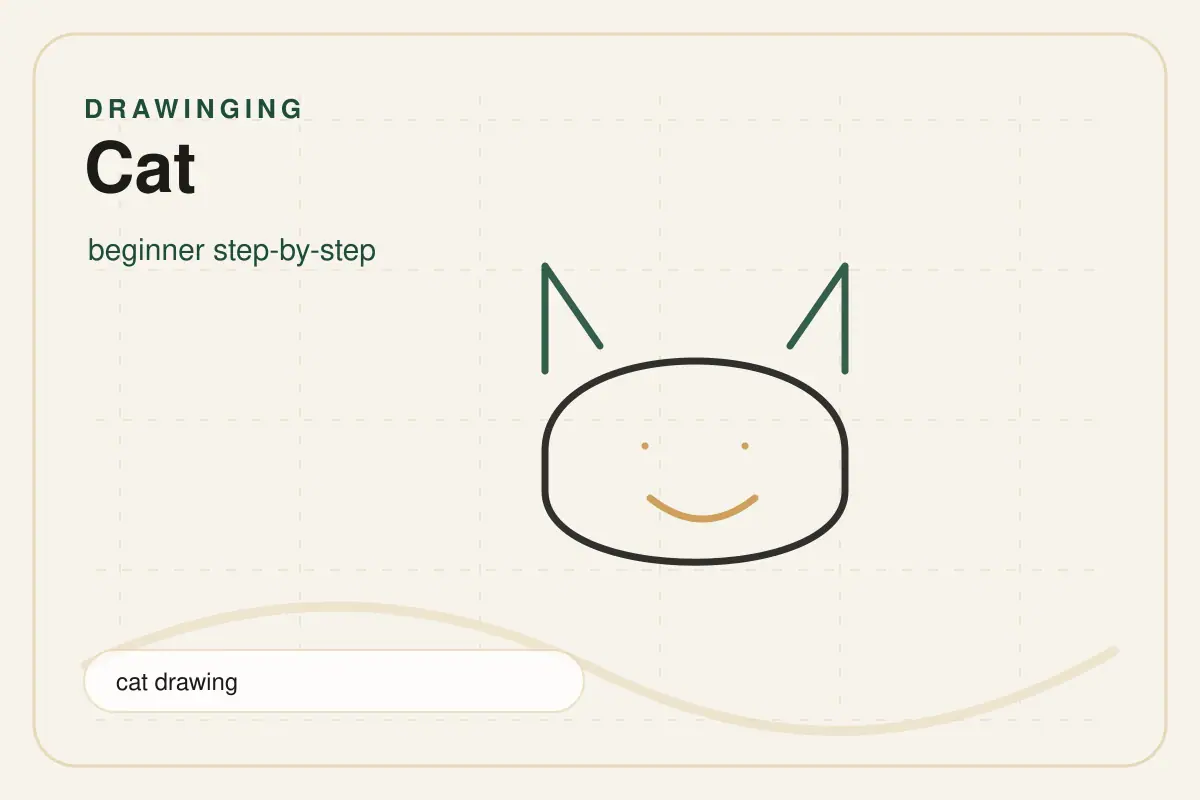
A calm sitting pose is one of the best ways to learn cat drawing because the main forms are clear and easy to compare. You will begin with a rounded head, a soft chest, and a larger rear body before adding ears, paws, tail, whiskers, and gentle fur marks.
This lesson keeps the animal friendly and simple. Once the construction feels steady, you can turn the same sketch into a cartoon pet, a kitten, or a more detailed pencil study.
Cat Drawing Tutorial Overview
- Difficulty: Beginner
- Estimated time: 25-35 minutes
- Number of steps: 9
- Main medium: Graphite pencil
- Worksheet: Free printable PDF available
- Main skills: Simple shapes, face guides, proportion, overlap, line weight, and light shading
What You Will Learn
This tutorial shows how to build a sitting cat from large shapes before drawing small details. You will learn how to place a head guide, set the face with a centerline, connect the chest and rear body, and keep the paws aligned on a shared ground line.
You will also practise triangular ears, almond eyes, a small nose, a relaxed mouth, whiskers, and a tail that supports the pose. The same method works for a simple animal sketch, a drawing of a cat, or a pencil cat sketch with clean proportions.
Materials Needed
HB pencil
Use an HB pencil for light head, body, face, and paw guides.
2B pencil
A 2B pencil is useful for darker pupils, final outlines, paw shadows, and fur accents.
Eraser
Use a clean eraser to remove guides after the final contour is clear.
Drawing paper
Smooth drawing paper helps with clean curves; printer paper is fine for practice.
Black fineliner
A fineliner is optional for a bold finished outline.
Colored pencils
Colored pencils can add orange, gray, black, cream, or tabby markings.
Before You Start
Place the head slightly above the center of the page. Leave room below for the paws and enough space to one side for the tail.
Keep your pencil pressure pale during the first half of the lesson. The head circle, face guides, chest oval, and rear body are construction marks, not final outlines.
Before drawing facial details, compare both sides of the head. The ears do not have to be identical, but their height and angle should feel related.
If you need more practice with construction, review basic shapes before starting. If your animals often look stretched or cramped, the proportions guide will help.
Step-by-Step Cat Drawing
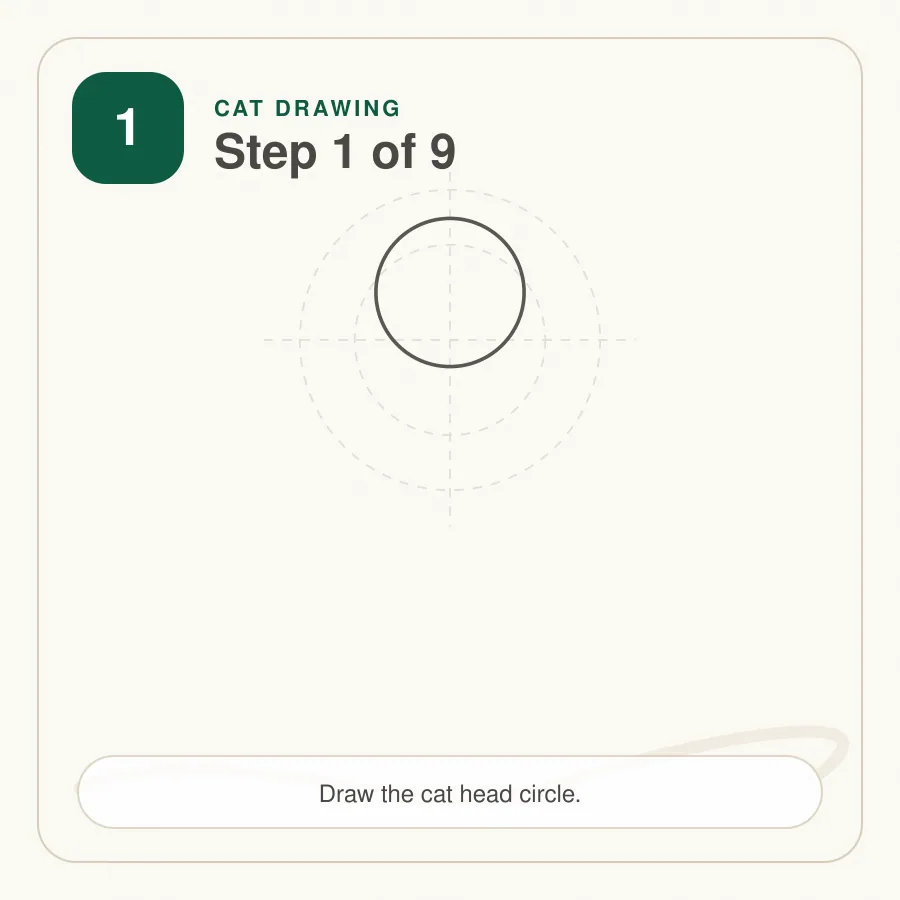
Step 1: Draw the Head Shape
Start with a soft circle or rounded oval slightly above the middle of the page. This shape will hold the eyes, nose, mouth, and ears, so keep it light and easy to adjust.
Leave extra room below for the chest and paws, and leave space on one side for the tail.
Tip: Keep the head pale and simple; it is only a guide at this stage.
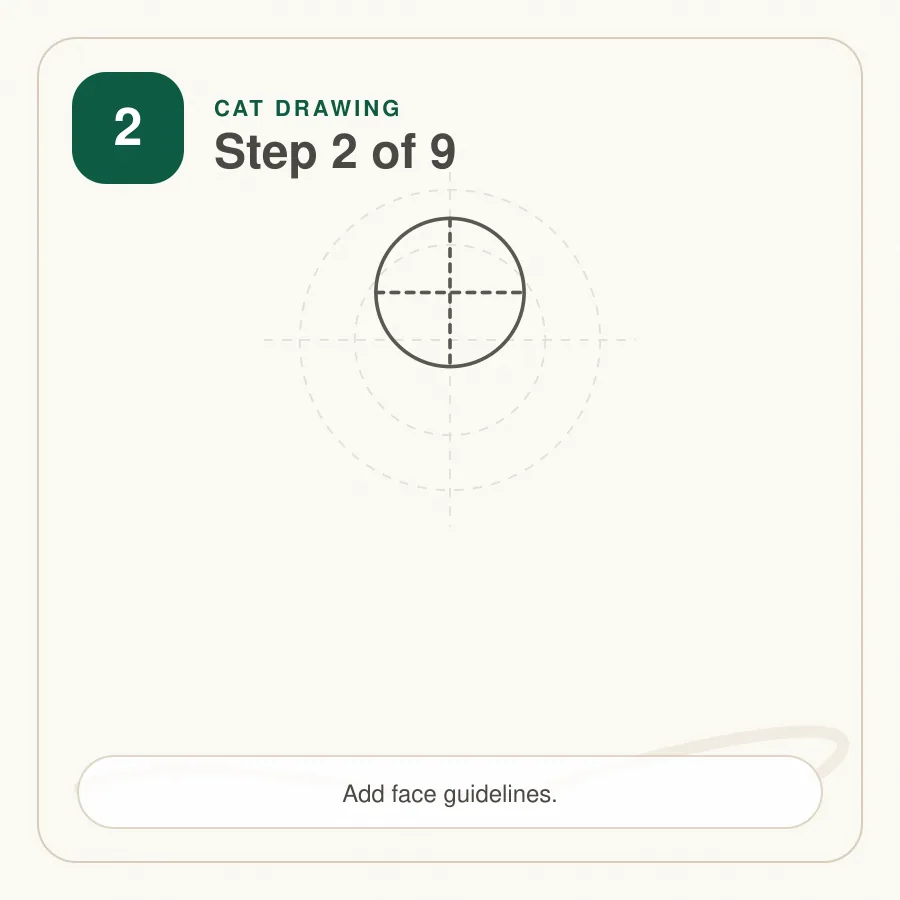
Step 2: Add the Face Guides
Draw a light vertical line down the center of the head. Add a gentle horizontal guide a little below the middle for the eyes. These two guides help keep the face even.
If the head is turned slightly, curve the vertical guide just a little instead of making it perfectly straight.
Tip: Check both halves of the face before placing any dark details.
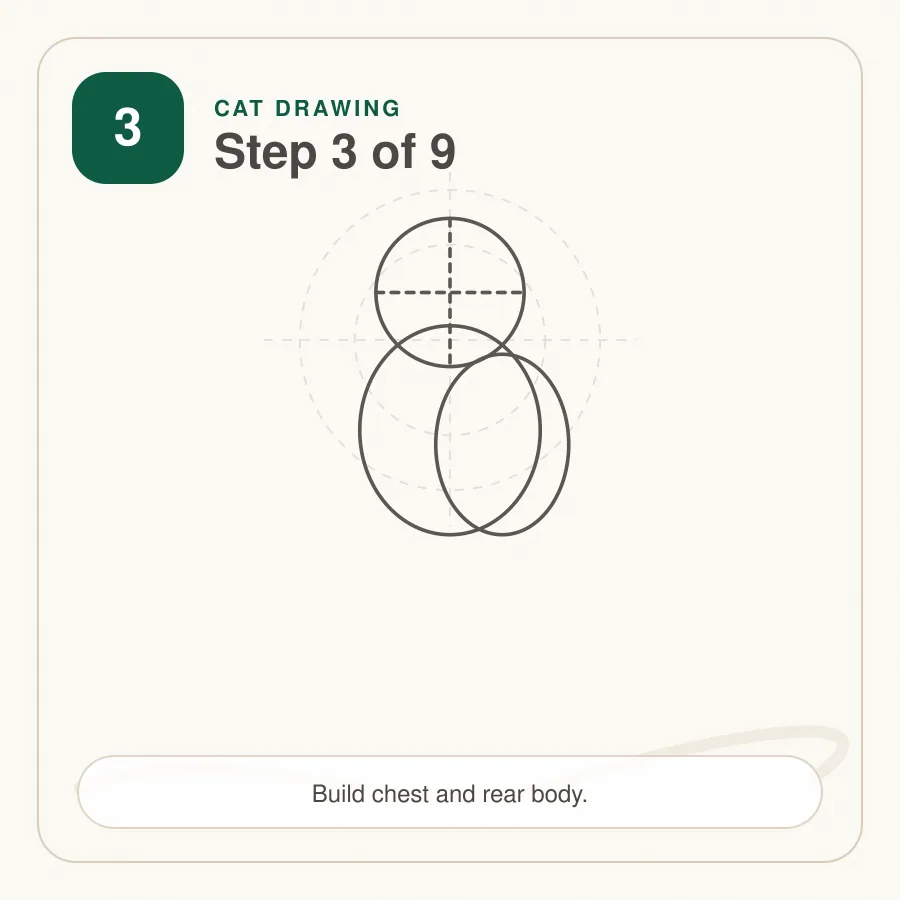
Step 3: Sketch the Chest and Rear Body
Under the head, draw a narrow chest oval. Behind it, add a larger rounded shape for the rear body. Let the two forms overlap so the cat feels seated rather than flat.
The rear shape should be slightly wider because it supports the hind leg and tail.
Tip: Think of the body as two connected cushions before adding legs.
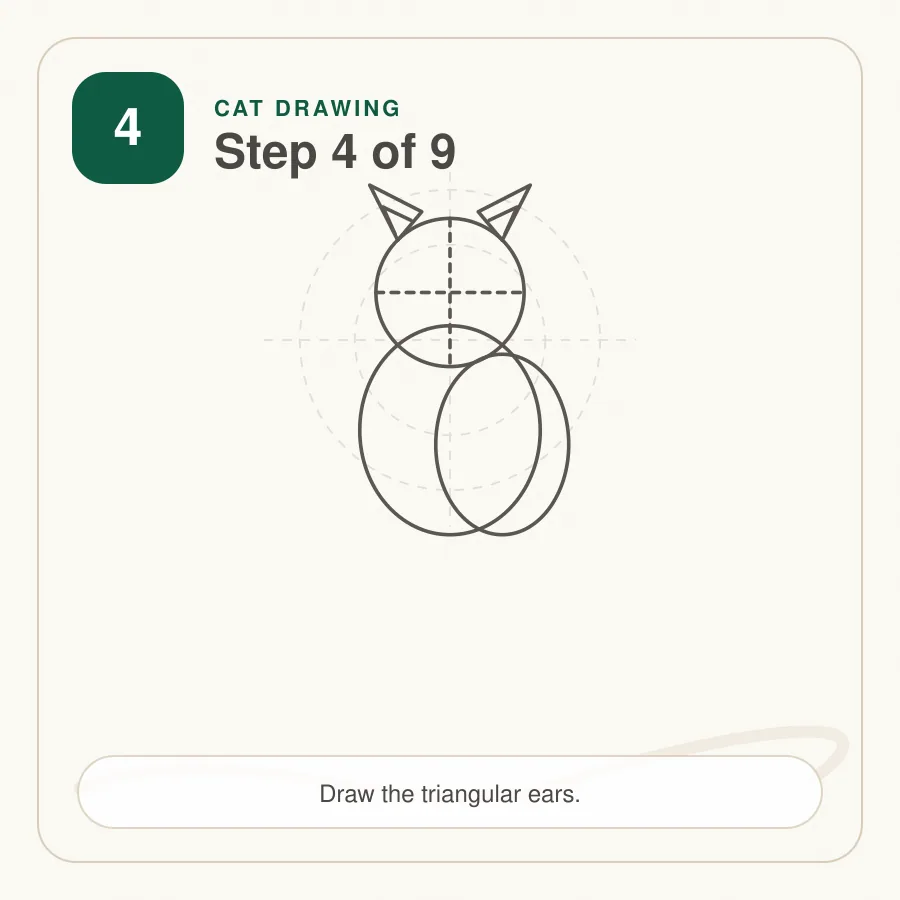
Step 4: Draw the Ears
Add two tall triangles on top of the head, then soften their corners. The inner ear shapes can be smaller triangles set just inside the outer edges.
Compare the ears with each other and with the head width. They should be alert but not so large that they overpower the face.
Tip: Draw the ear on the far side a little narrower if the head turns.
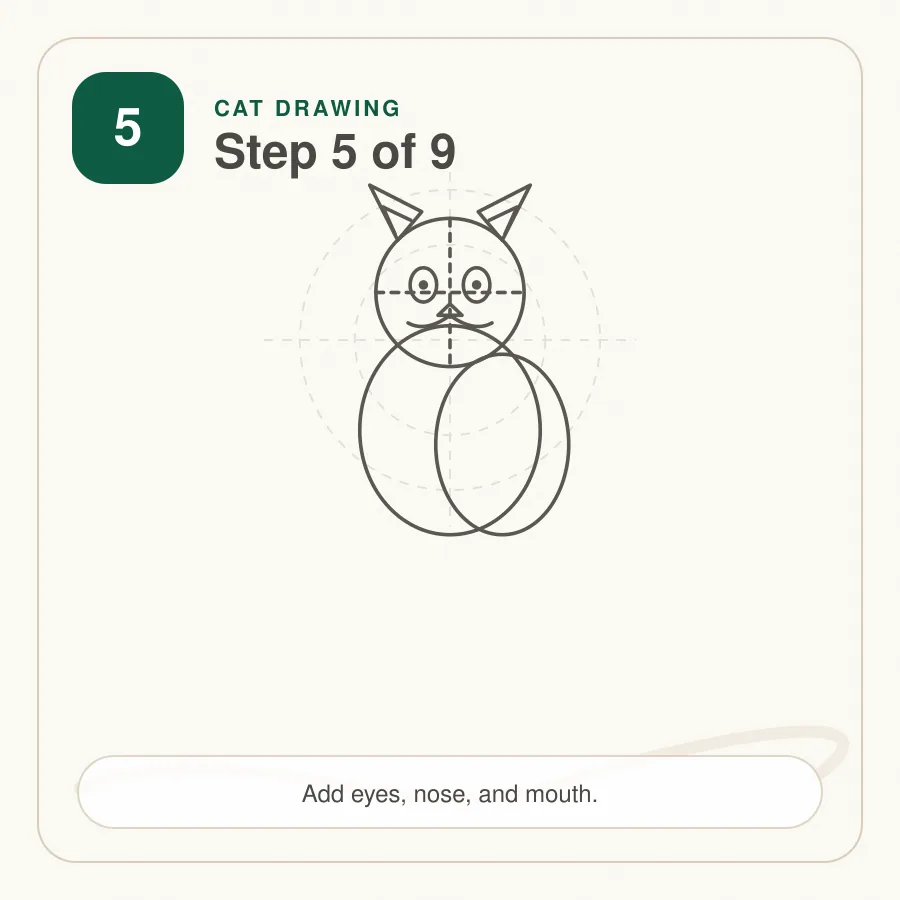
Step 5: Add the Eyes, Nose, and Mouth
Place two almond-shaped eyes on the horizontal guide. Add a small triangle or rounded nose below them on the centerline. From the nose, draw a short line down and split it into a soft mouth curve.
Keep the muzzle simple so the expression stays friendly.
Tip: Leave tiny highlights in the eyes before adding darker pupils.
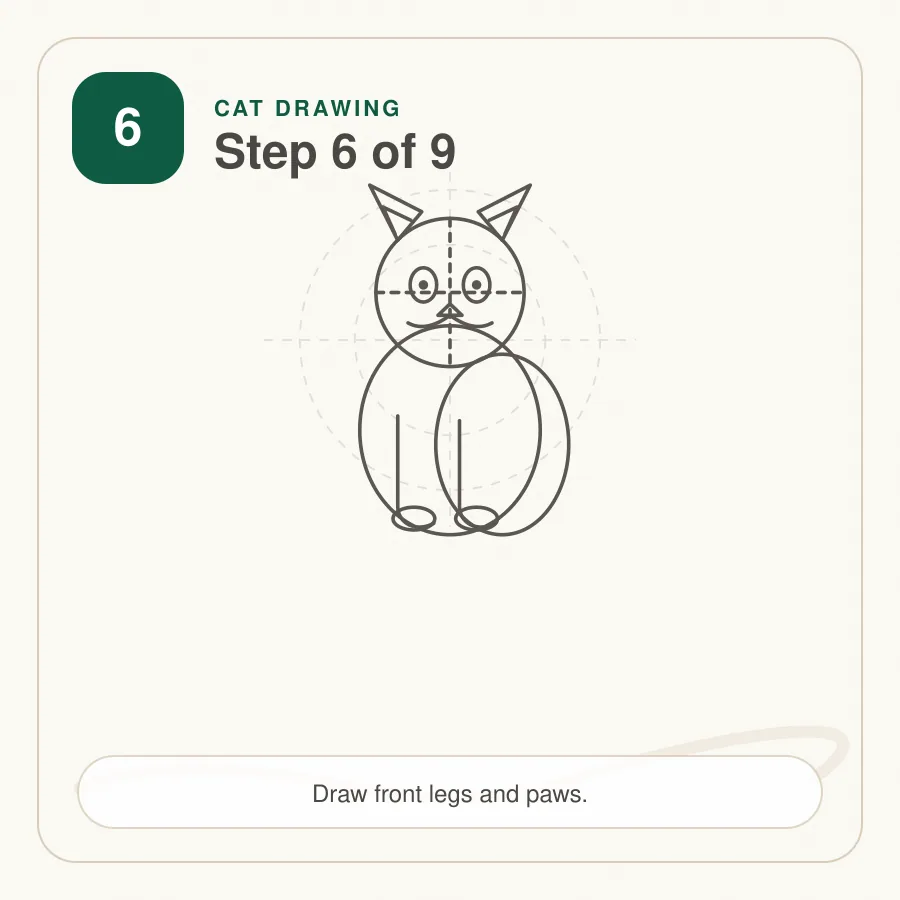
Step 6: Draw the Front Paws
From the chest, bring two front legs down with gentle parallel curves. Add small rounded paws at the bottom and place them on the same ground line.
The legs should look relaxed, not stiff. Add one or two short toe marks only after the paw shapes are even.
Tip: A shared ground line keeps the animal from looking tilted.
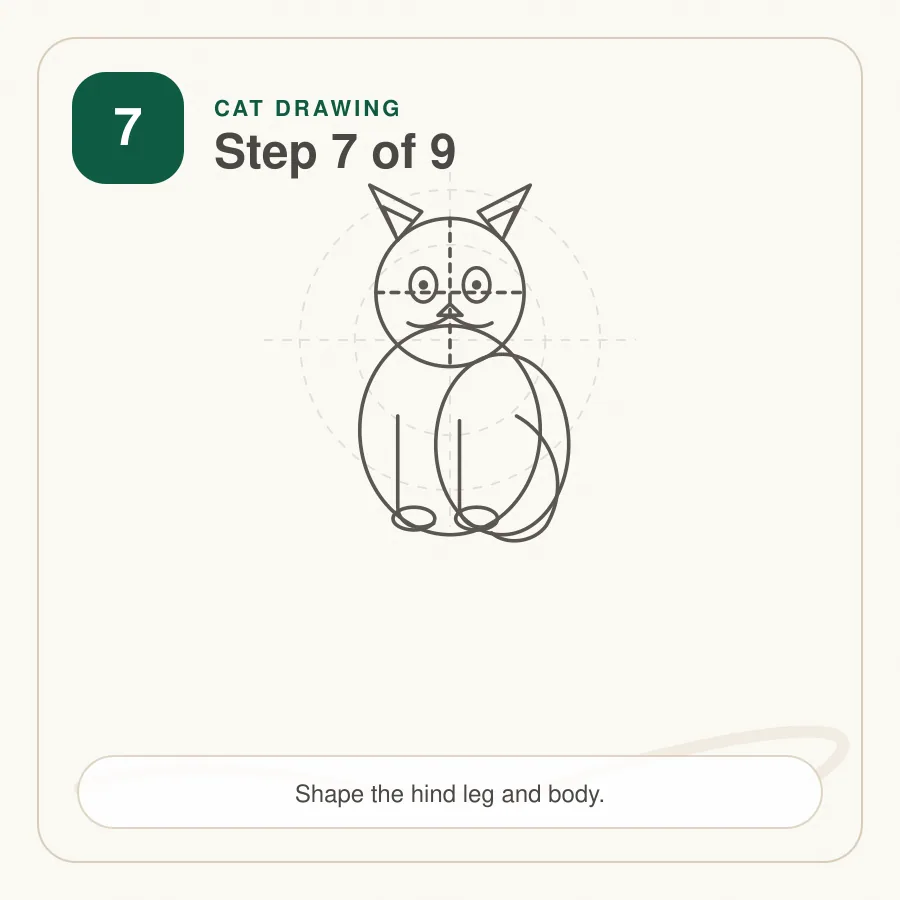
Step 7: Add the Hind Leg
Draw a curved hind leg along the larger rear body shape. Let the thigh round outward, then taper down toward a soft back paw.
This leg should feel tucked beside the front paws. Use overlap to show which forms sit in front of the belly.
Tip: Keep the hind paw wider and flatter than the front paws.
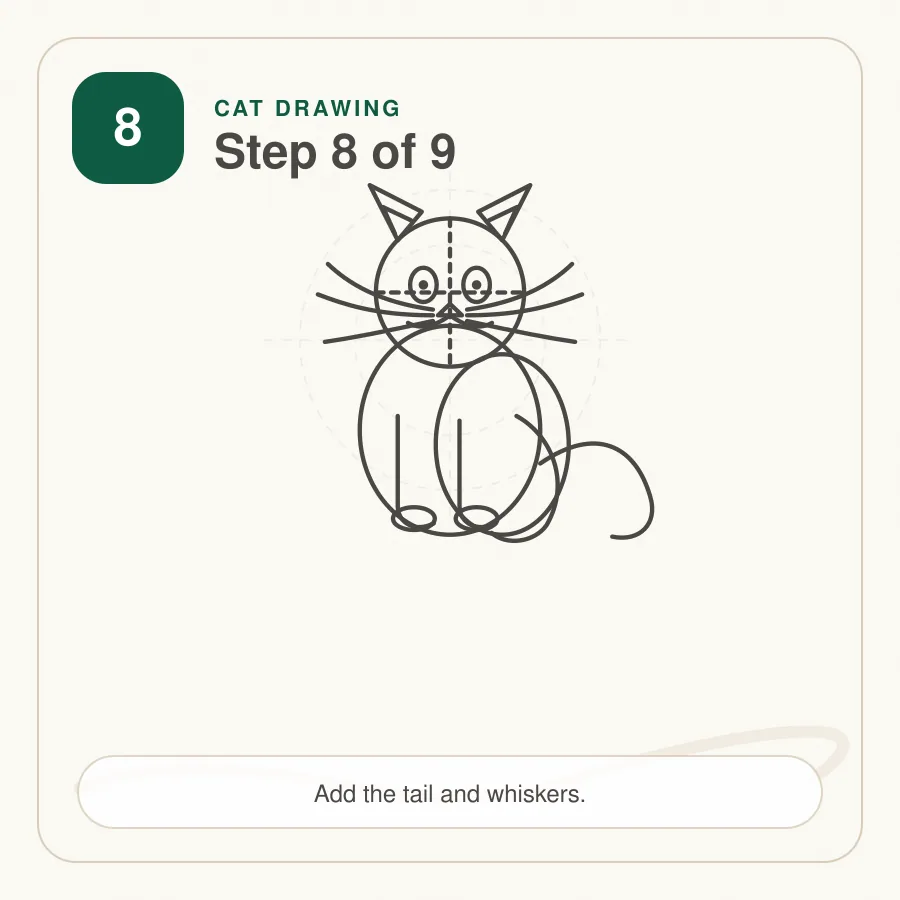
Step 8: Draw the Tail and Whiskers
Add a long curved tail from the rear body. It can wrap beside the paws or curl upward behind the body.
Then draw three or four whiskers from each side of the muzzle with quick, confident strokes. Add a few cheek tufts if you want a softer outline.
Tip: Pull whisker lines from the muzzle outward in one smooth motion.
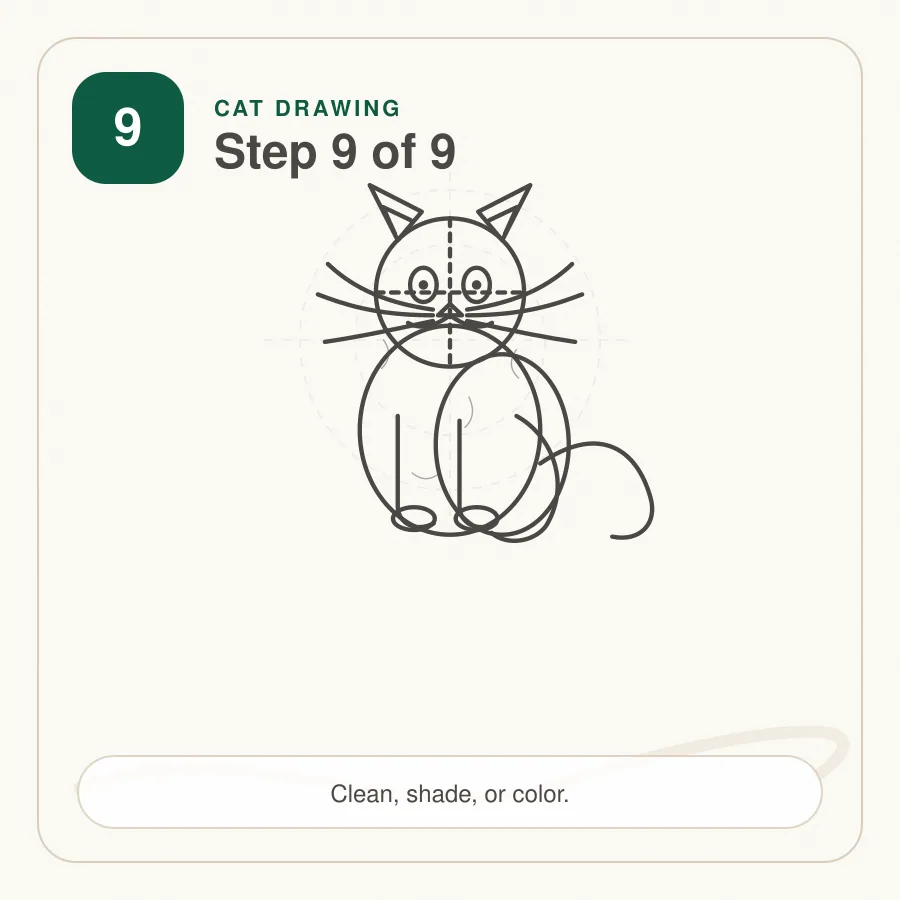
Step 9: Clean the Lines and Add Shading
Erase the construction lines inside the face and body. Strengthen the outer contour, especially around the ears, paws, and tail.
Add light shadows beneath the head, under the belly, and where the paws touch the ground. Finish with a few short fur strokes that follow the form.
Tip: Keep most texture light so the face remains the main focus.
How to Refine the Final Drawing
Begin by checking the whole silhouette. The head should balance above the chest, the rear body should have weight, and the tail should look attached.
Erase guide lines that run through the eyes, muzzle, body, or paws. If an ear looks uneven, redraw it lightly before darkening the edge.
Use varied line weight. Darker lines work well beneath the chin, around the paw contact points, and at the tail base. Keep cheek fur and whiskers lighter than the main outline.
Shading and Coloring the Cat
Choose one light direction before adding value. Shade under the chin, beneath the chest, along the belly, and where the paws touch the ground.
Use short strokes for fur, but do not cover every area. A few marks near the cheeks, chest, and tail can suggest texture clearly. Use the shading guide and line control guide if you want smoother values and cleaner whiskers.
Easy Cat Drawing Variation
For a faster version, reduce the animal to five parts:
- Round head.
- Triangle ears.
- Oval body.
- Four short paws.
- Curved tail.
Use dots for the eyes, a small triangle nose, and three whiskers on each side. Skip fur texture and keep the outline simple.
Cartoon Cat Drawing Variation
To make the pose more playful, enlarge the eyes and make the head slightly bigger than normal. Use rounder paws, a cheerful curved mouth, and a tail that curls like a question mark.
Keep the ears attached to the head, place the eyes on the same guide, and make sure the paws touch the ground.
Cute Kitten Drawing Variation
For a kitten, make the head larger, the body smaller, and the legs shorter. Round the ears slightly and give the eyes more space.
Avoid adding too many stripes or shadows. Soft forms and gentle details usually look cuter.
Simple Cat Face Drawing
If you only want the face, start with the same rounded head and centerline. Add two ears, place the eyes on a horizontal guide, and keep the nose low.
Draw the mouth with two small curves and add whiskers from the muzzle area.
Common Cat Drawing Mistakes
Pressing too hard at the beginning
Dark construction lines are difficult to erase and can remain visible through the final sketch.
Placing the eyes without guides
Eyes that sit at different heights can make the expression look accidental. Use a light guide first.
Making the ears too small
Small ears can make the animal read as another pet. Keep them tall enough to identify the subject.
Floating paws
Use one ground line so the front paws and hind leg feel like they rest on the same surface.
Adding whiskers too early
Wait until the muzzle is centered. Whiskers emphasize the face, so misplaced whiskers make mistakes more obvious.
Using fur everywhere
Too many identical marks can make the drawing noisy. Group texture around the cheeks, chest, joints, and tail.
Tips for Drawing Cats for Beginners
- Build the sketch from head, chest, and rear body shapes.
- Keep the first marks light enough to erase.
- Compare both ears before drawing the face.
- Use a centerline and eye guide for balance.
- Align the paws with a simple ground line.
- Draw whiskers with confident outward strokes.
- Add only enough fur texture to suggest softness.
For more animal practice, continue with the dog tutorial, horse tutorial, lion tutorial, or bird tutorial. You can also browse the full animal drawing category.
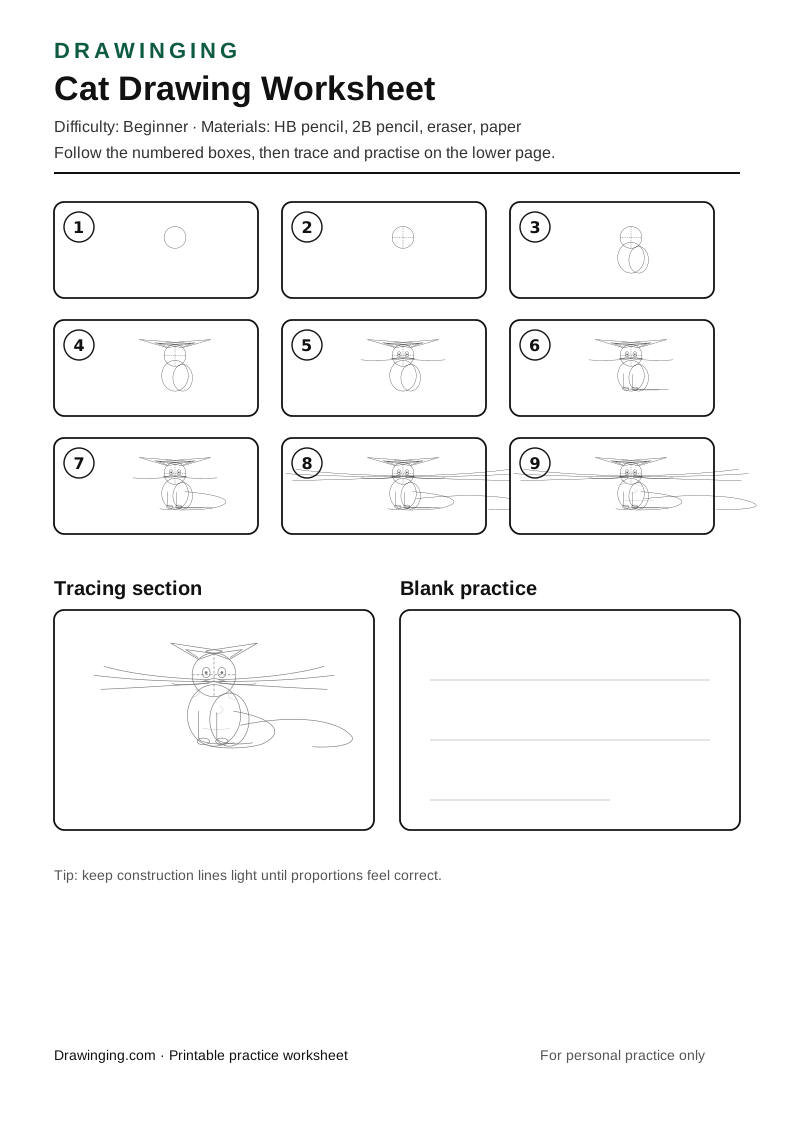
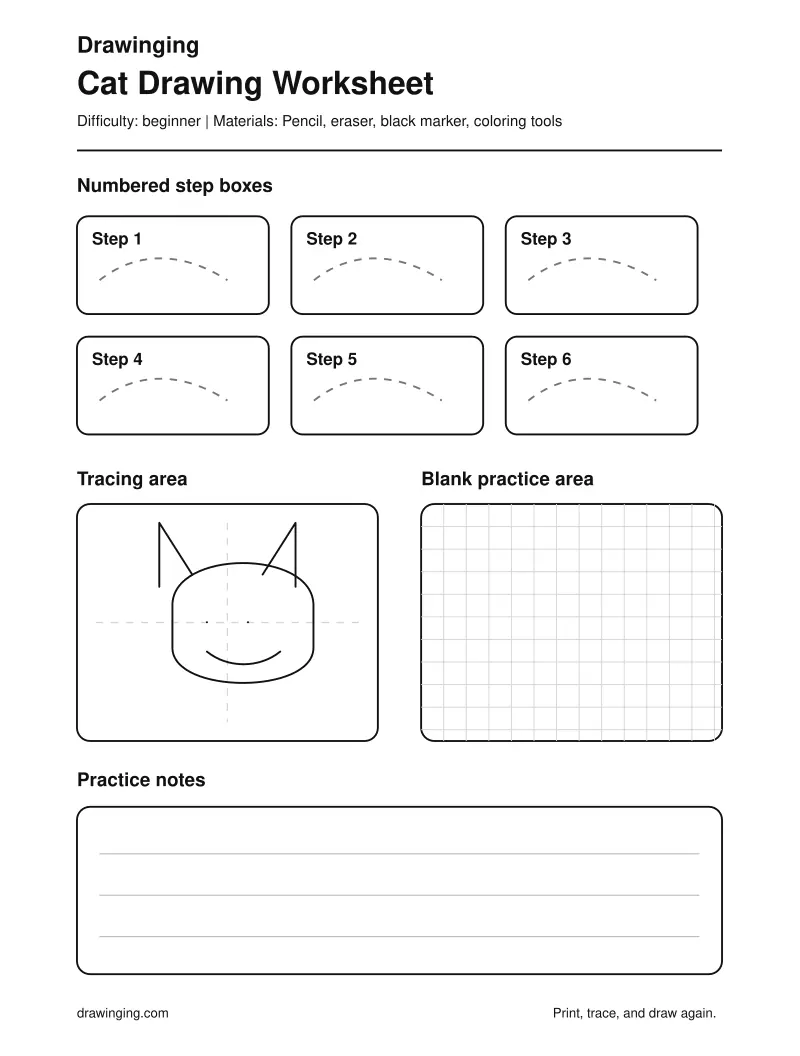
Download the Cat Drawing Worksheet
Use the printable worksheet to practise the same nine-step process on paper.
The worksheet includes:
- nine numbered step boxes
- a tracing exercise
- a blank drawing area
- a simple materials reminder
- a finished cat reference
- printer-friendly black lines
Download the Cat Drawing Worksheet PDF
Related Drawing Tutorials
After completing this lesson, try these related pages:
- Draw a friendly dog
- Practise a horse with longer proportions
- Try a lion with a mane
- Sketch a simple bird
- Add a butterfly beside your pet sketch
- Explore more animal tutorials
Frequently Asked Questions
What is the easiest way to start drawing a cat?
Start with a rounded head and two simple body masses. Add details only after the silhouette feels balanced.
How do I make a cat face look balanced?
Use a light centerline and eye guide. Place the nose low and compare both eyes before adding whiskers.
Which pencil is best for a beginner cat sketch?
An HB pencil is best for construction lines, while a 2B pencil can darken outlines, shadows, and fur accents.
How can I draw simple cat fur?
Use short strokes that follow the body direction. Keep most fur marks near the cheeks, chest, tail, and joints.
Can I turn this lesson into a kitten drawing?
Yes. Make the head larger, the body smaller, the paws rounder, and the eyes slightly bigger.
Can I print the cat worksheet?
Yes. The printable worksheet includes step boxes, tracing space, and a blank practice area.
Final Thoughts
A clear cat drawing starts with patient construction. Place the head, body, paws, and tail before committing to the face, then use selective texture to make the sketch feel soft.
Repeat the worksheet and change one feature at a time. A bigger head creates a kitten, rounder eyes create a cartoon style, and stronger shadows create a finished pencil study.