A realistic dog drawing starts with structure before detail. In this pencil tutorial, you will angle the head, build the skull and muzzle, place the eyes, nose, ears, chest, legs, and paws, then finish with fur direction and soft shading.
The method is beginner friendly but leans toward a believable pet portrait instead of a cartoon outline.
Dog Drawing Tutorial Overview
- Difficulty: Beginner
- Estimated time: 30-40 minutes
- Number of steps: 10
- Main medium: Graphite pencil
- Worksheet: Free printable PDF available
- Main skills: Head angle, proportions, muzzle construction, paw placement, fur direction, and pencil shading
What You Will Learn
This lesson shows how to build a pet portrait from simple construction lines. You will use a tilted head guide, a skull mass, and a muzzle block so the face has believable depth before the eyes and nose are added.
You will also attach ears, place a chest and body below the head, draw grounded paws, and shade fur without covering the sketch in gray.
Materials Needed
HB pencil
Use an HB pencil for head guides, body shapes, and light fur direction.
2B pencil
A 2B pencil helps darken pupils, nostrils, ear shadows, and the deepest fur accents.
Kneaded eraser
A kneaded eraser can lift graphite gently from the muzzle, forehead, and chest highlights.
Drawing paper
Smooth drawing paper works best for controlled shading, but printer paper is fine for practice.
Blending stump
A blending stump is optional. Use it sparingly to soften broad shadows without losing fur strokes.
Sharpener
Keep a sharp point for eyes, nose highlights, whisker dots, and small paw details.
Before You Start
Choose a simple reference or imagine a calm seated dog facing slightly to one side. Leave enough room below the head for the chest, legs, and paws. If the head fills the whole page, the body will feel cramped later.
Begin with very light pressure. The head angle, muzzle length, and ear placement may need small corrections before the final contour is ready. Use pale construction lines that can disappear under later shading.
Step-by-Step Dog Drawing
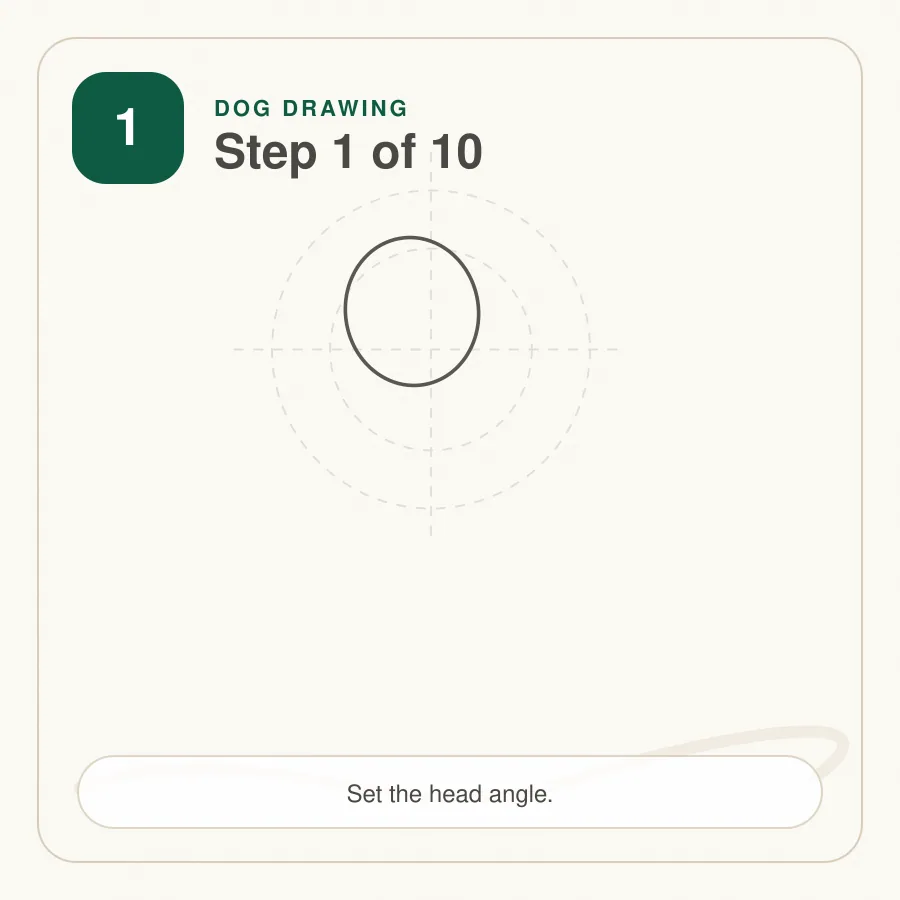
Step 1: Set the Head Angle
Draw a light tilted oval for the head and place a soft centerline through it. Add a short cross line for the eye level. These guides decide whether the dog looks straight ahead, down, or slightly to the side.
Tip: Keep the angle pale until the muzzle and ears confirm the pose.
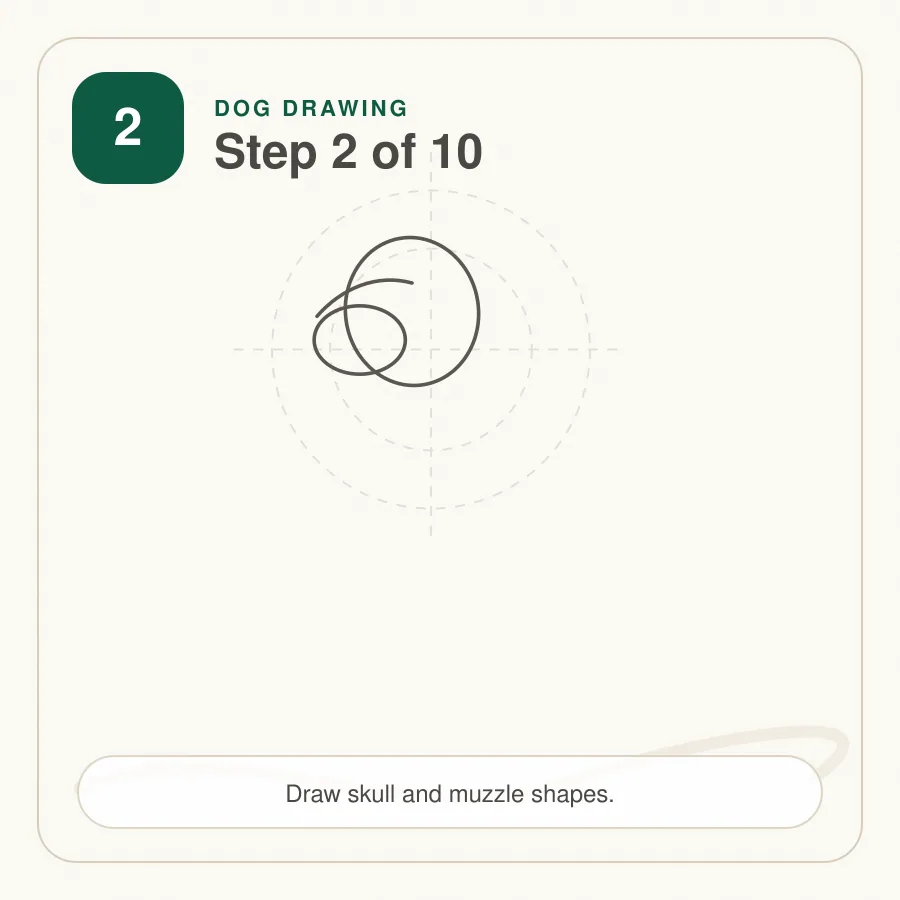
Step 2: Build the Skull and Muzzle
Add a rounded skull mass behind the face and a boxy muzzle projecting from the front. The muzzle should taper slightly toward the nose but still feel solid enough to hold the mouth and whisker area.
Tip: Compare muzzle length with skull width before drawing details.
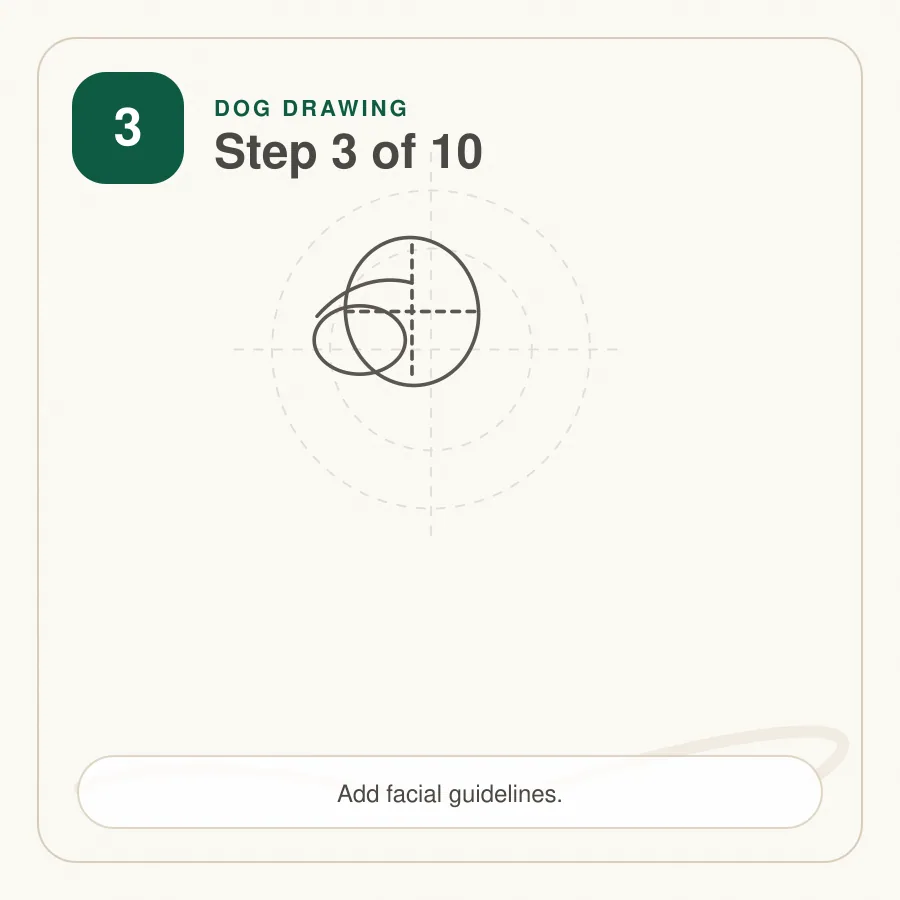
Step 3: Add Facial Guide Lines
Place a centerline over the muzzle, then mark the eye line, nose line, and mouth line. These light guides keep both sides of the face organized even when the head is turned.
Tip: Curved guides help the features wrap around the head.
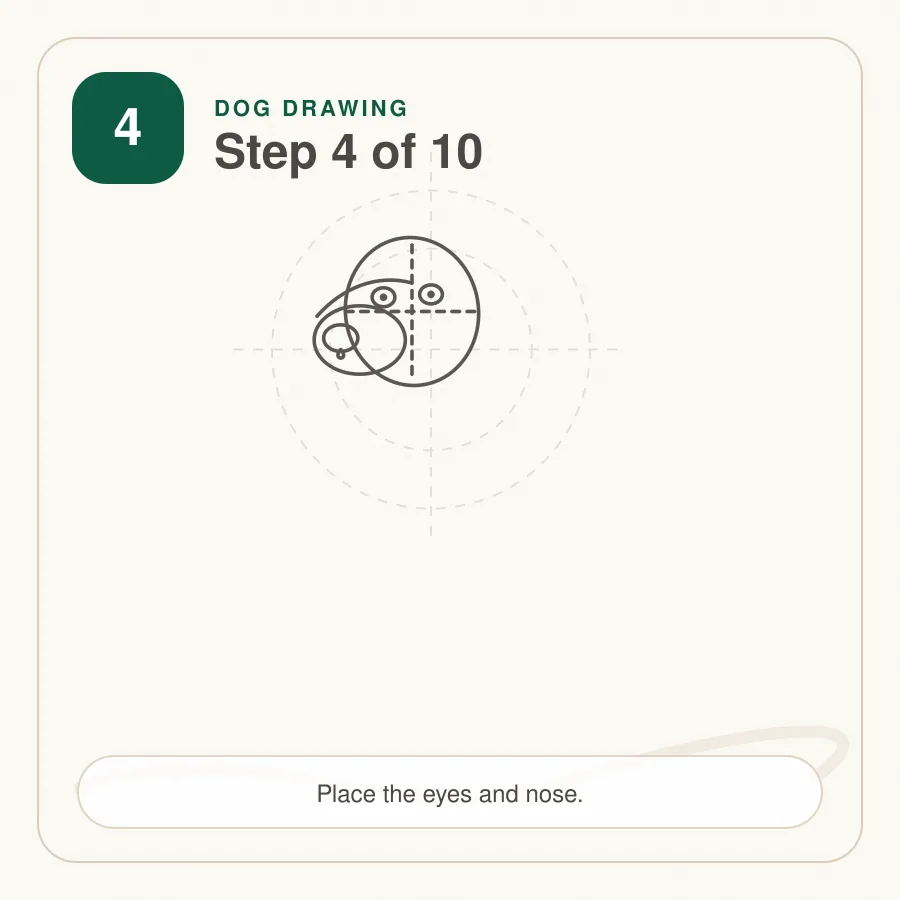
Step 4: Draw the Eyes and Nose
Sketch almond-shaped eyes on the guide line, then place the nose at the end of the muzzle. Add small highlights in the eyes and nose before darkening the pupils or nostrils.
Tip: Leave tiny white highlights untouched for a livelier expression.
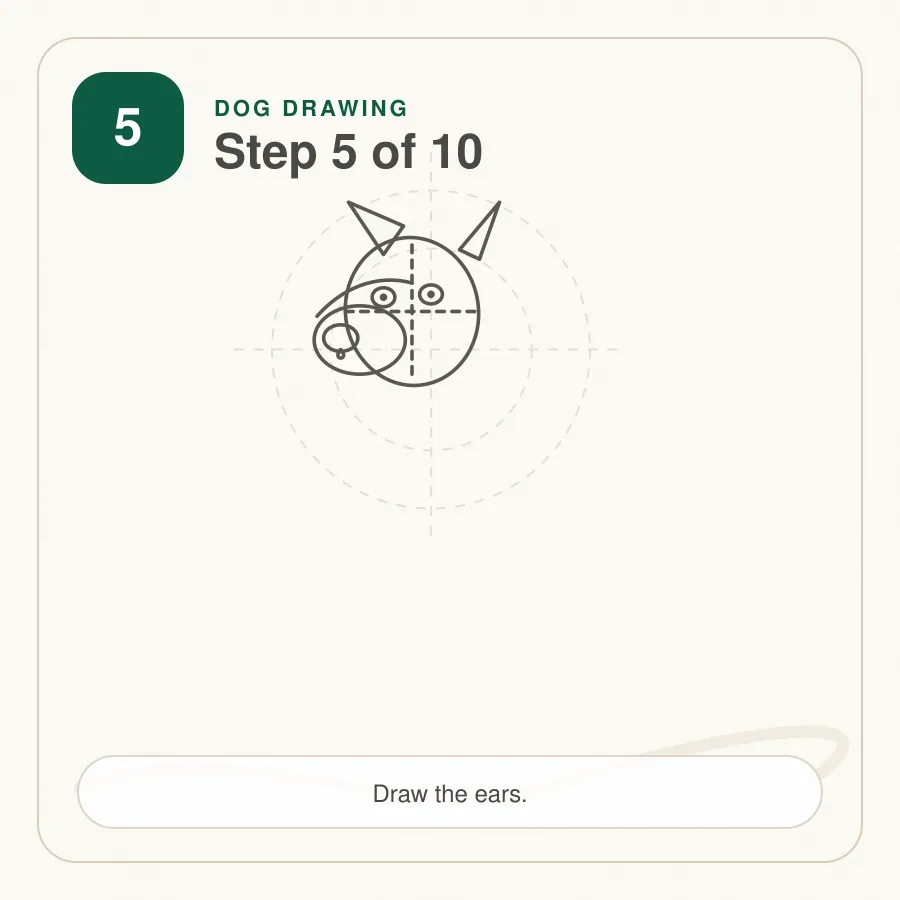
Step 5: Attach the Ears
Draw each ear from the side of the skull. Let the base overlap the head, then taper or fold the ear according to the type of dog you want to show. Keep both ears related to the same head angle.
Tip: Ears look natural when they attach behind the brow line.
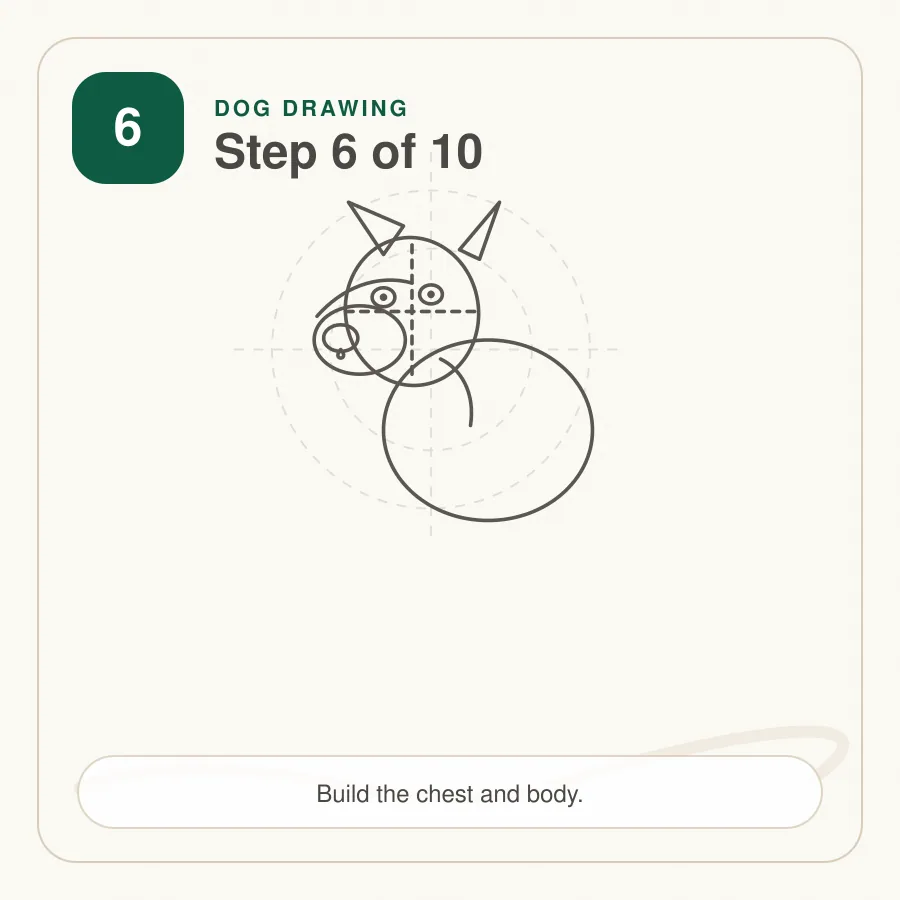
Step 6: Sketch the Chest and Body
Add a broad chest beneath the head and a softer body shape behind it. The chest should support the neck, while the back and belly create the main silhouette of the seated or standing pose.
Tip: Make the chest large enough to balance the head.
Step 7: Place the Legs and Paws
Block in the front legs with simple columns and place the paws on the same ground line. Add rear leg shapes if they are visible. Separate toes with a few short curves, not heavy outlines.
Tip: Paws should feel flat on the ground before toe details are added.
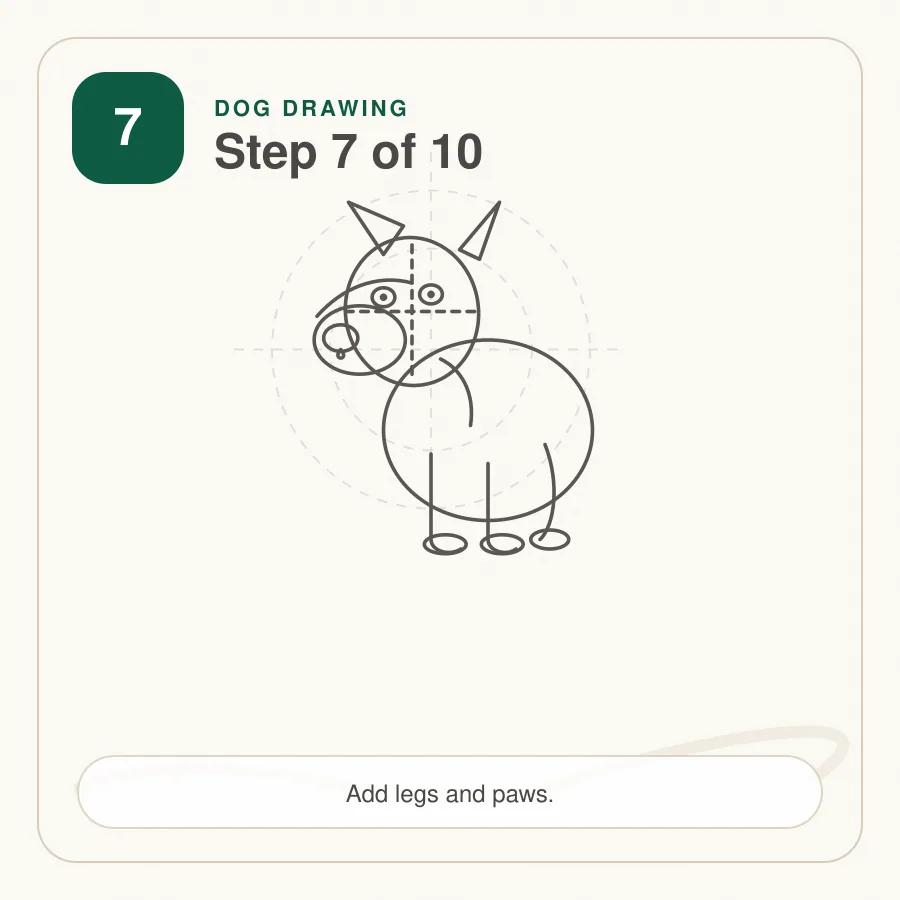
Step 8: Refine the Face
Clean the muzzle, cheeks, brow, and jaw with smoother contours. Add the mouth line and small whisker dots only after the larger planes look correct. Keep the expression calm and balanced.
Tip: The face improves quickly when the nose, eyes, and mouth share one angle.
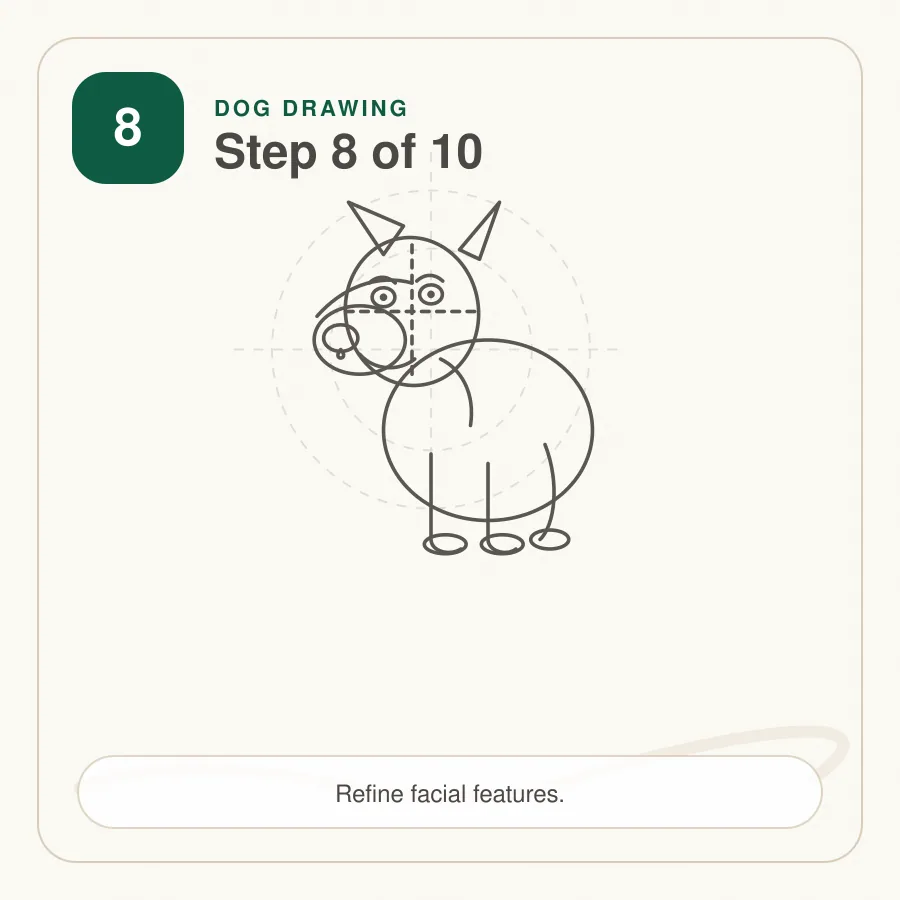
Step 9: Add Fur Direction
Use short pencil strokes to show fur growing away from the nose, down the cheeks, along the ears, and over the chest. Vary the length of the strokes so the coat does not look like repeated patterning.
Tip: Fur marks should follow the form underneath them.
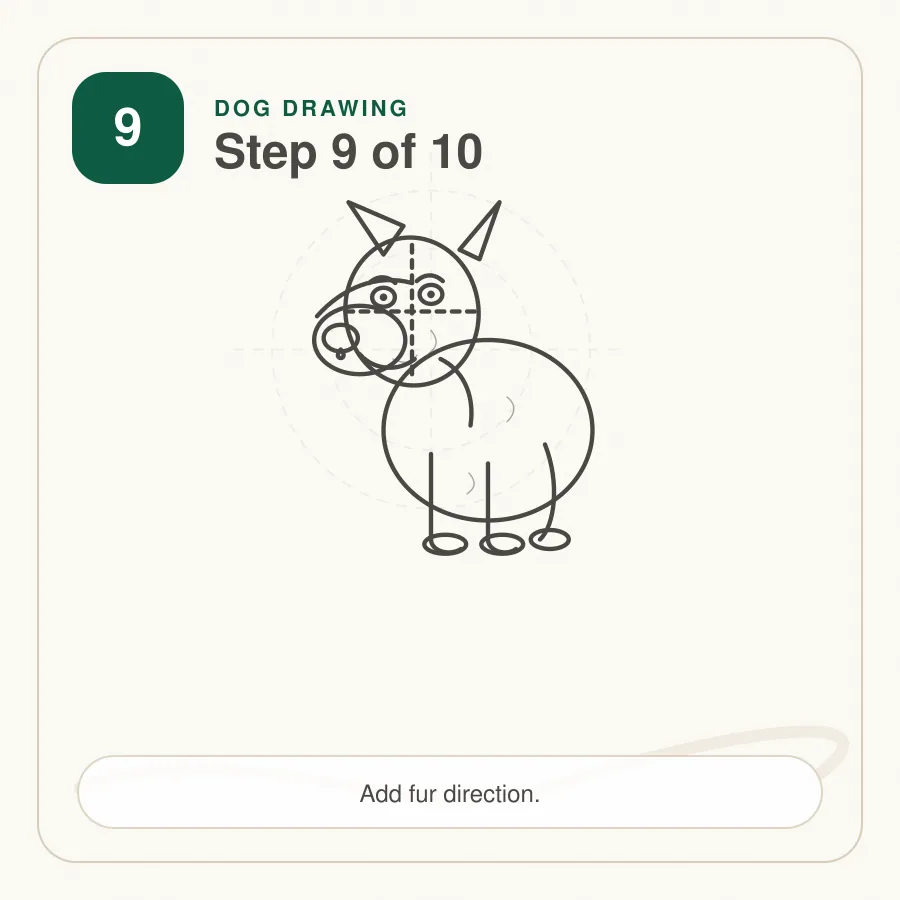
Step 10: Shade and Finish
Choose one light direction and shade the underside of the ears, muzzle, chest, legs, and paws. Deepen the pupils, nostrils, and contact shadows, then soften any remaining construction lines.
Tip: Save the darkest marks for eyes, nose, and small overlap shadows.
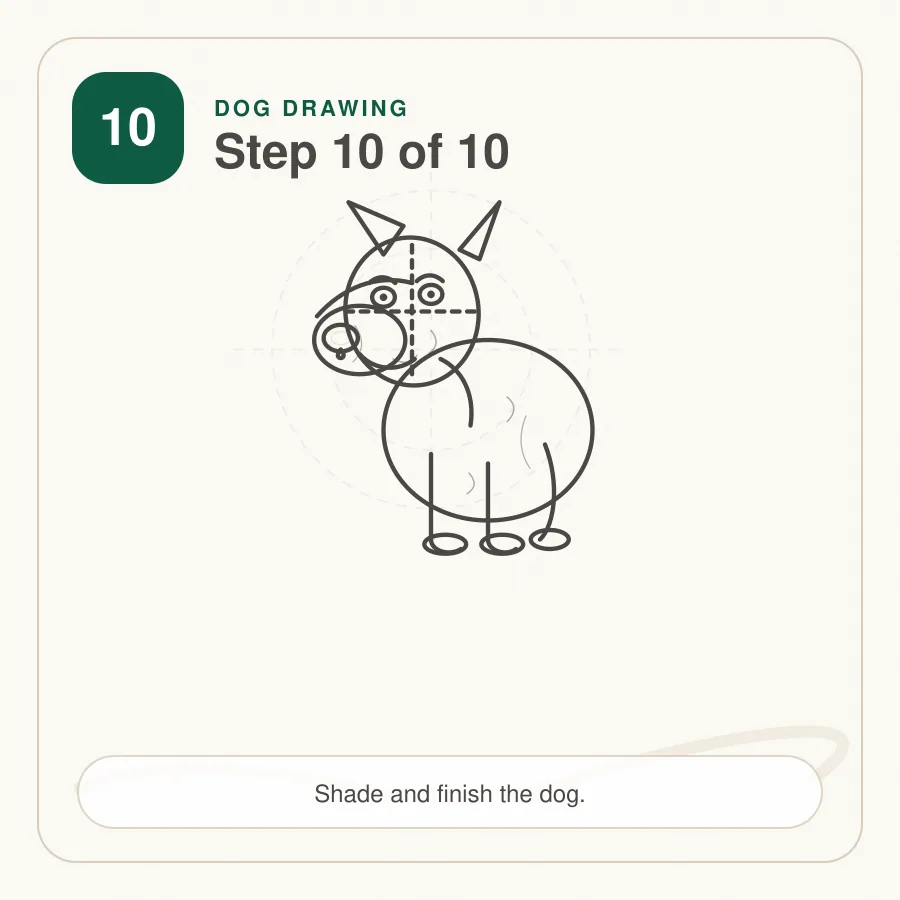
Easy Dog Drawing Construction
If the full portrait feels challenging, reduce the subject to five construction shapes: one tilted head oval, one muzzle block, one chest shape, two ear shapes, and four simple paw blocks. This easy dog drawing construction keeps the lesson manageable while preserving believable proportions.
Check the big angles before adding details. The centerline should pass through the forehead, muzzle, and nose. The eye line should match the head tilt. The front paws should share the same ground level unless the dog is stepping forward.
For extra help with simple forms, review basic shapes and practise turning ovals and boxes before returning to the portrait.
Realistic Dog Face Drawing
A realistic face depends on spacing. The eyes sit across the skull, the nose projects from the muzzle, and the mouth wraps under the front plane. Avoid placing all features on a flat outline.
The brow usually casts a small shadow over the eyes. The nose has a dark lower edge, soft side planes, and a bright highlight. Whisker dots should be subtle and grouped around the muzzle, not scattered across the whole face.
Pencil Shading for Dog Fur
Dog fur looks convincing when the stroke direction changes with the form. Strokes on the muzzle move outward from the nose. Cheek fur angles down and away. Ear fur usually follows the fold, while chest fur drops in longer, softer marks.
Use darker values only where the form turns away from the light. The inside of the ears, the underside of the muzzle, and the gap between paws can carry stronger graphite. For more control over values, see pencil shading.
Colored Dog Drawing Variation
Colored pencils can be layered over the graphite sketch after the proportions are clean. Start with the lightest coat color, then add tan, brown, gray, or black in the same direction as the fur.
How to Make a Dog Drawing Look Realistic
Realism comes from proportion, overlap, and value more than from many tiny hairs. Check the muzzle against the skull, the ears against the head, and the paws against the chest. If these relationships are correct, the portrait will feel more believable.
Use line weight to show depth. Darken the places where the ears overlap the skull, where the muzzle tucks under the brow, and where the paws touch the ground. Keep outer fur edges slightly broken instead of tracing one hard border around the entire dog.
How to Refine the Final Drawing
Begin refinement by stepping back from the page. Squint at the silhouette and check whether the head, chest, legs, and paws still feel connected.
Check the proportions one last time with the proportions guide if the head or muzzle feels uncertain.
Shading and Coloring the Dog
Decide where the light is coming from before adding dark graphite. If the light is above and to the left, the right side of the muzzle, the lower ears, the underside of the chest, and the spaces between toes will be darker.
Layer shading slowly. Start with pale strokes, deepen the shadow shapes, then use a kneaded eraser to lift small highlights along the forehead, nose bridge, and chest.
For color, keep the first layers light. Add darker coat colors only after the main value pattern works in pencil.
Common Dog Drawing Mistakes
Starting with dark outlines
Dark outlines make it difficult to adjust the head angle, muzzle length, and body placement.
Ignoring the muzzle block
A face can look flat when the nose and mouth are placed on a simple oval without a projecting muzzle.
Misplacing the ears
Ears should attach to the skull and overlap the head, not float beside it.
Drawing round paws
Paws need flat bases and small toe divisions so they look like they carry weight.
Shading fur randomly
Random strokes fight the form. Follow the direction of the coat and leave quiet spaces.
Tips for Drawing Dogs for Beginners
- Keep the head angle visible until the eyes, nose, and muzzle are placed.
- Build the skull and muzzle before drawing fur.
- Place the chest before the legs so the body has weight.
- Draw paws as blocks, then add toes.
- Use broken outer lines for soft fur edges.
- Save the darkest pencil pressure for eyes, nostrils, and overlap shadows.
- Repeat the same dog drawing process with different ear lengths and coat textures.
Download the Dog Drawing Worksheet
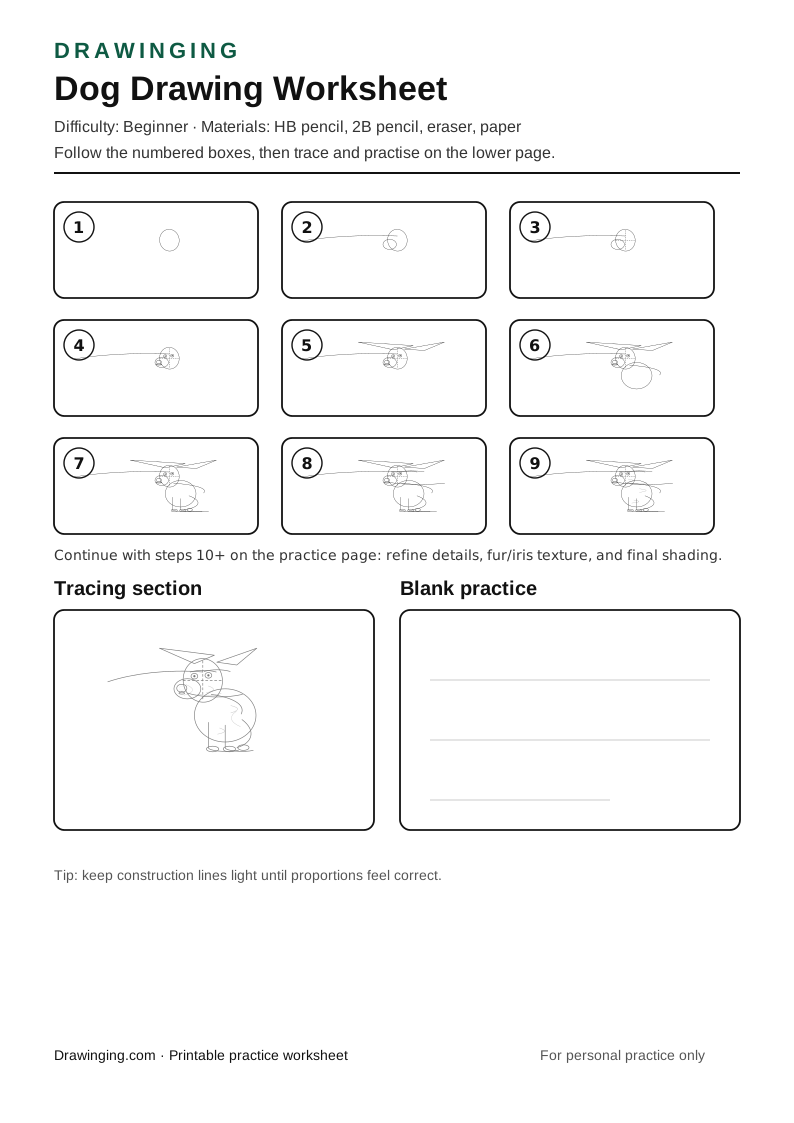
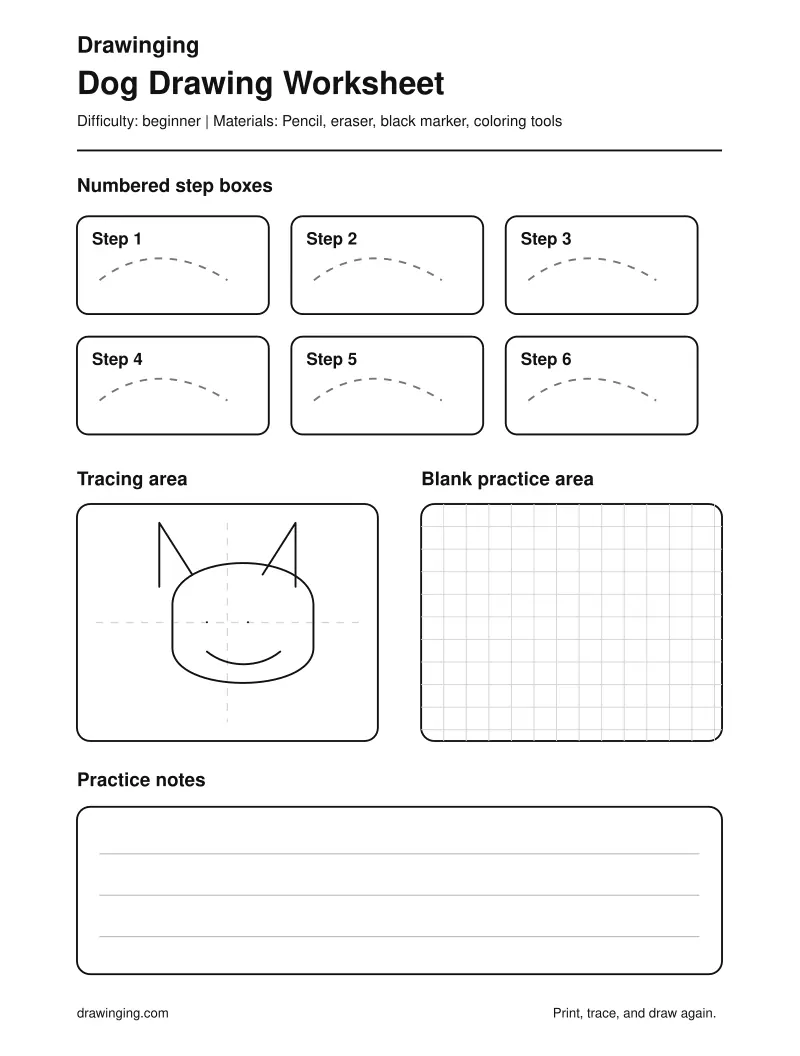
Use the printable worksheet to practise the same ten-step process on paper.
The worksheet includes:
- ten numbered step boxes
- a tracing exercise
- a blank drawing area
- a simple materials reminder
- a finished dog reference
- printer-friendly black lines
Download the Dog Drawing Worksheet PDF
Related Drawing Tutorials
After completing this lesson, continue with these animal tutorials:
- Practise cat proportions and fur
- Draw a horse with longer body structure
- Try a lion face and mane
- Sketch a bunny with soft ears
Frequently Asked Questions
What is the easiest way to start a realistic dog sketch?
Begin with the head angle, skull mass, muzzle block, and chest shape before drawing fur. These simple guides keep the proportions steady.
How do I make the muzzle look accurate?
Compare the muzzle length with the skull, place a centerline through the face, and keep the nose on the same angle as the head.
How should beginners draw dog paws?
Use small block shapes first, then separate the toes with short curved lines. Keep the paws aligned with the leg direction.
Which pencil is best for dog fur?
Use an HB pencil for light fur direction and a 2B pencil for deeper shadows around the ears, muzzle, chest, and paws.
Can I use colored pencils for this tutorial?
Yes. Build the graphite sketch first, then add light tan, brown, gray, or black layers in the same direction as the fur.
Can I print the dog worksheet?
Yes. The worksheet includes the ten-step process, tracing space, and a blank practice area for repeating the sketch.
Final Thoughts
A convincing animal portrait depends on patient construction more than heavy texture. Build the head, muzzle, body, legs, and paws first, then let the fur strokes follow those forms.
Use the worksheet to repeat the process until the angles feel familiar. Your next dog drawing can become a different breed by changing ear shape, muzzle width, coat length, and color pattern.