A realistic eye drawing is built around a sphere, not a flat almond outline. This tutorial shows how to place the axis, corners, lids, iris, pupil, highlights, crease, lashes, brow, and final values in a clear order.
The method is detailed enough for realism but still organized for beginners. Work lightly at first, protect the catchlight, and build values slowly so the finished eye looks glossy rather than outlined.
Eye Drawing Tutorial Overview
- Difficulty: Intermediate
- Estimated time: 35-50 minutes
- Number of steps: 10
- Main medium: Graphite pencil
- Worksheet: Free printable PDF available
- Main skills: Axis placement, eyelid structure, iris texture, pupil value, lash taper, and pencil shading
What You Will Learn
This lesson explains how to construct an eye as a rounded form. You will place the inner and outer corners first, wrap the upper and lower lids around the eyeball, and draw a round iris that sits naturally behind the lid edges.
You will also learn how to preserve highlights, shade the pupil, texture the iris, taper lashes, and compare values before the final pass. These skills are useful for portraits, character studies, and any eye drawing that needs more realism.
Materials Needed
You only need a few graphite tools for this study.
HB pencil
Use an HB pencil for the axis, corners, eyelids, iris, and early value map.
2B pencil
A 2B pencil is useful for the iris rim, eyelid shadow, crease, and soft lash roots.
4B pencil
Use a 4B pencil carefully for the pupil, darkest lashes, and deepest overlaps.
Kneaded eraser
A kneaded eraser can lift reflected light, soften the sclera, and restore small highlights.
Drawing paper
Smooth paper helps with clean blending and sharp edges around the catchlight.
Blending stump
A blending stump is optional. Use it for gentle skin and eyeball tone, not for the crisp iris texture.
Before You Start
Keep the page horizontal and leave room above the eye for the crease and brow. If the drawing is too close to the top edge, the brow area will feel cramped.
Draw lightly at first. The eyelids, iris, and pupil must align before you add lashes or dark shading. A dark mistake around the iris is hard to erase cleanly.
Decide where the catchlight will sit before you shade. The highlight usually crosses both the pupil and iris, and it should remain one of the brightest areas in the finished eye drawing.
Step-by-Step Eye Drawing
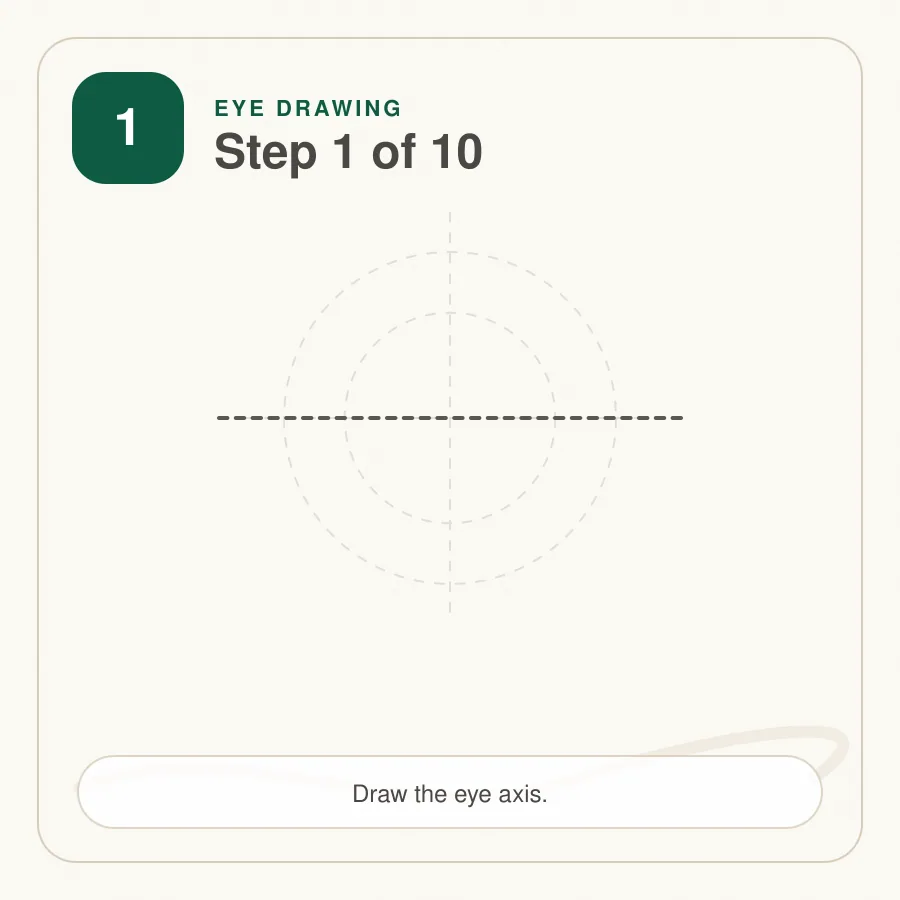
Step 1: Draw the Eye Axis
Begin with a light slanted axis. This line controls the tilt of the eye and keeps the corners, lids, iris, and brow working together.
A slight tilt often looks more natural than a perfectly horizontal guide. Keep the axis pale so it can disappear later.
Tip: A slight tilt feels more natural than a perfectly horizontal guide.
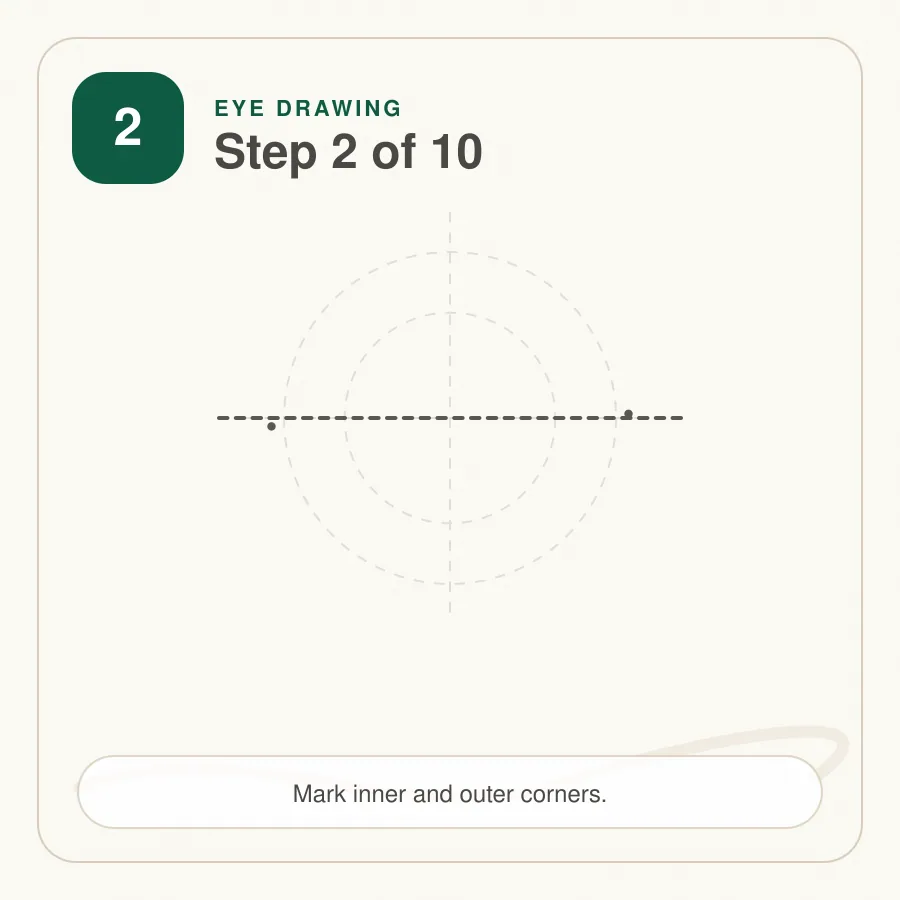
Step 2: Place the Inner and Outer Corners
Mark the inner corner and outer corner on the axis. The inner corner is often lower and more rounded, while the outer corner can be sharper.
Compare the distance between the corners with the height you want for the eye. A wide eye with little height can look calm; a taller shape can look more alert.
Tip: Check corner spacing before drawing the eyelids.
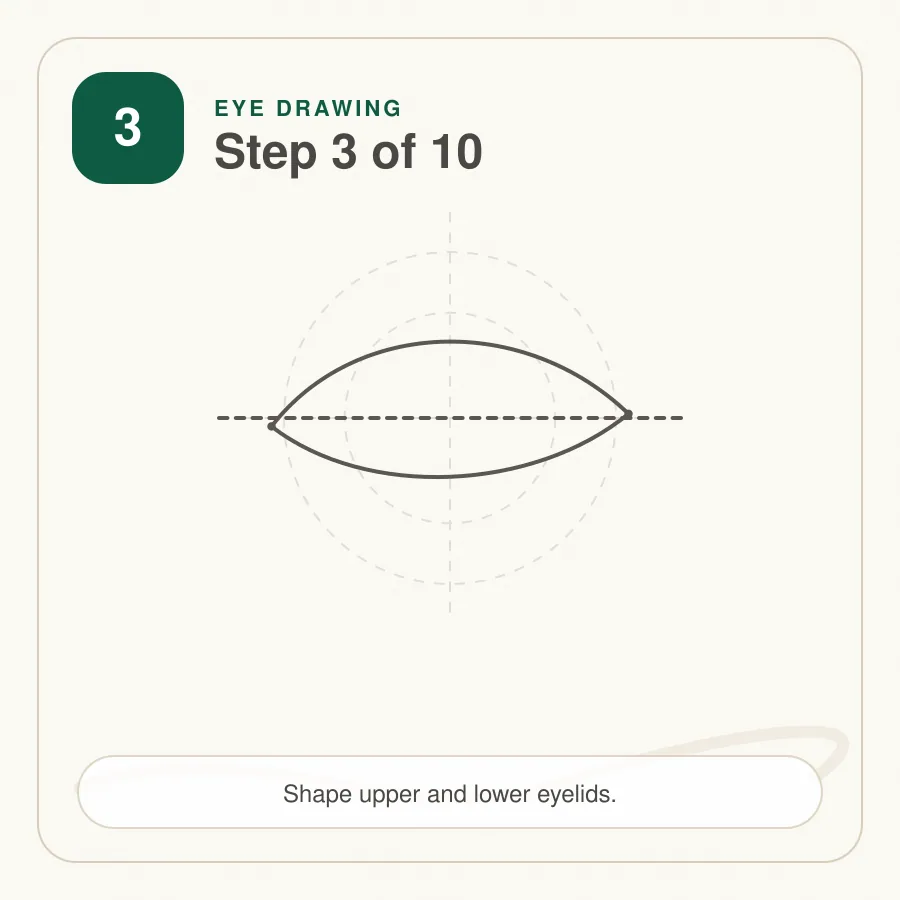
Step 3: Shape the Upper and Lower Lids
Draw the upper lid as a longer curve and the lower lid as a softer, flatter curve. Leave room for lid thickness and the waterline.
Avoid making both lids mirror each other. The upper lid usually has more weight, while the lower lid should feel quieter.
Tip: The upper lid usually overlaps the iris more than the lower lid.
Step 4: Add the Iris
Sketch a round iris between the lids. Let the upper lid cover a small part of the circle so the gaze feels relaxed and natural.
The iris must stay round even if part of it is hidden. Use light circular strokes and correct the shape before adding the pupil.
Tip: Use light circular strokes so the iris can be corrected easily.
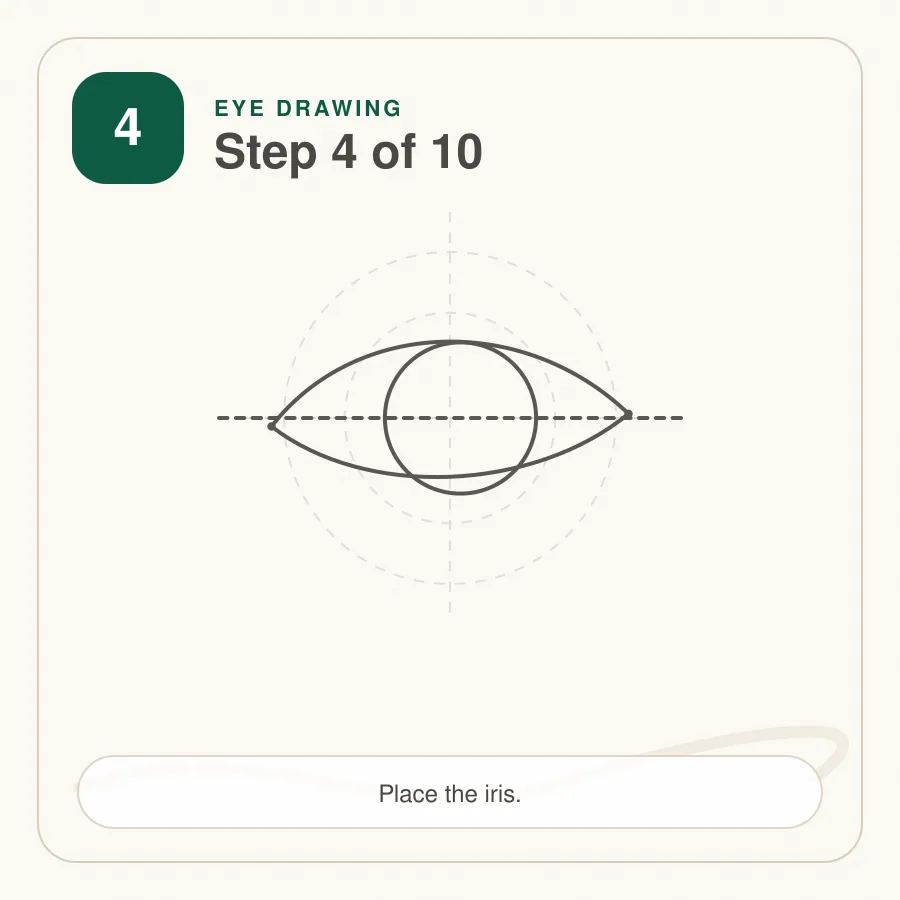
Step 5: Place the Pupil and Highlights
Add a centered pupil inside the iris, then reserve one or two highlight shapes. Keep those highlights clean before adding dark graphite.
The pupil should sit inside the iris, not drift toward one side unless you are intentionally changing the gaze direction.
Tip: The catchlight should stay lighter than every other part of the eye.
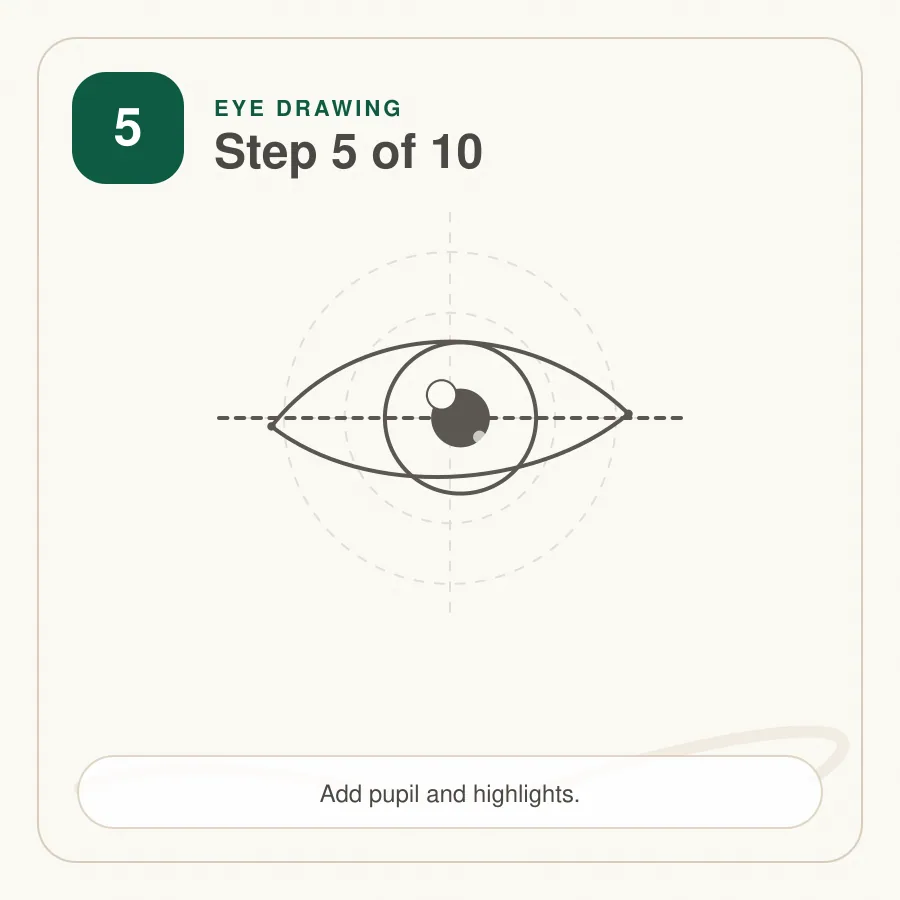
Step 6: Draw the Eyelid Crease
Place the crease above the upper lid, following the same general curve. Keep it lighter at the ends and stronger near the center.
The crease shows the fold of skin over the eyeball. It should echo the lid shape without becoming a second heavy outline.
Tip: The crease should echo the lid but not touch it everywhere.
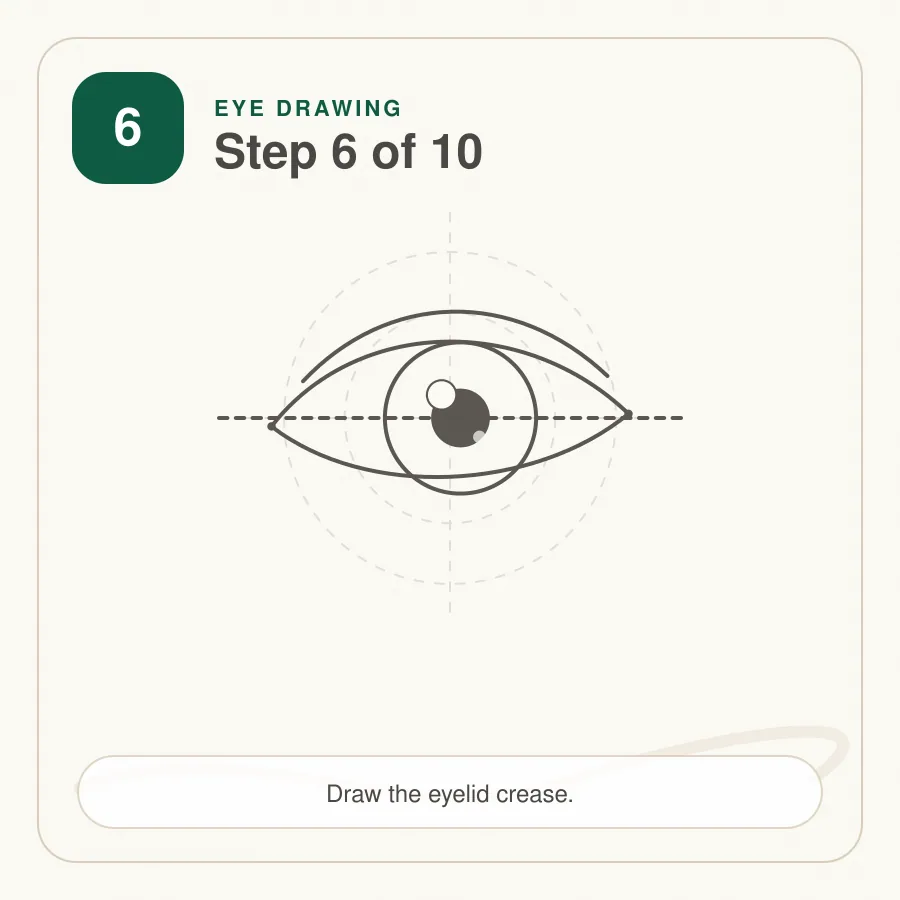
Step 7: Shade the Eyeball
Add a soft shadow beneath the upper lid and a faint tone along the sides of the sclera. Avoid leaving the entire white of the eye blank.
The eyeball is round, so the light should fade gently. Keep the lower center slightly lighter if the light source comes from above.
Tip: Gentle tone makes the eyeball feel round.
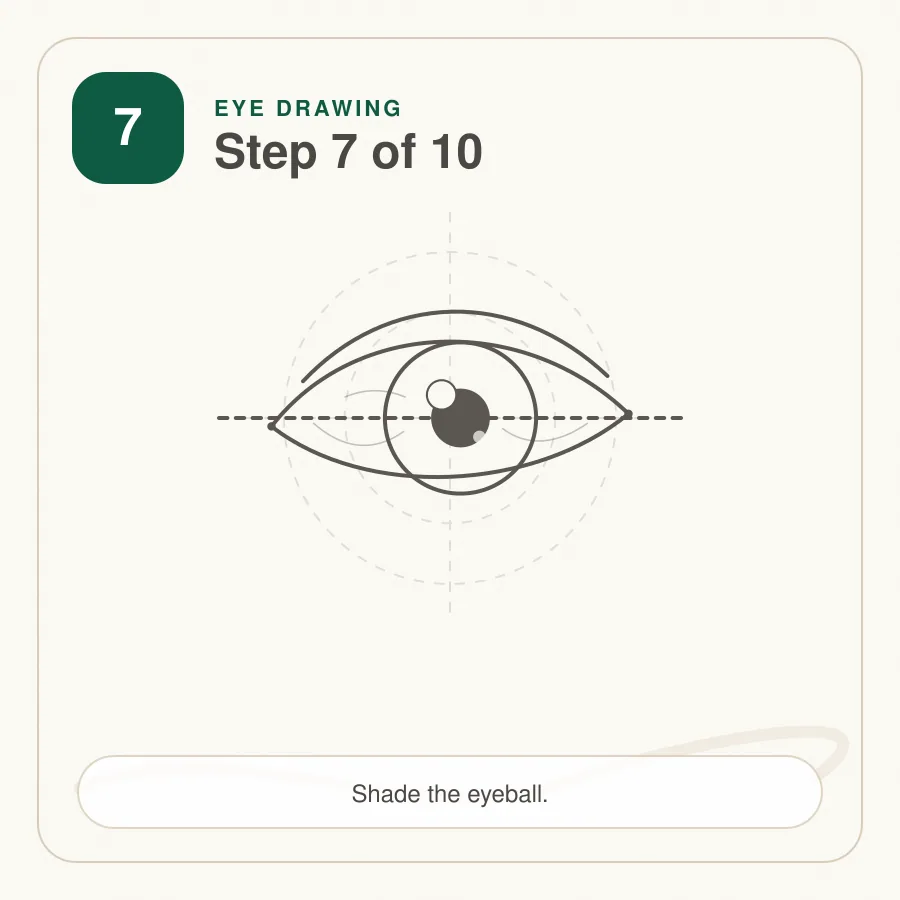
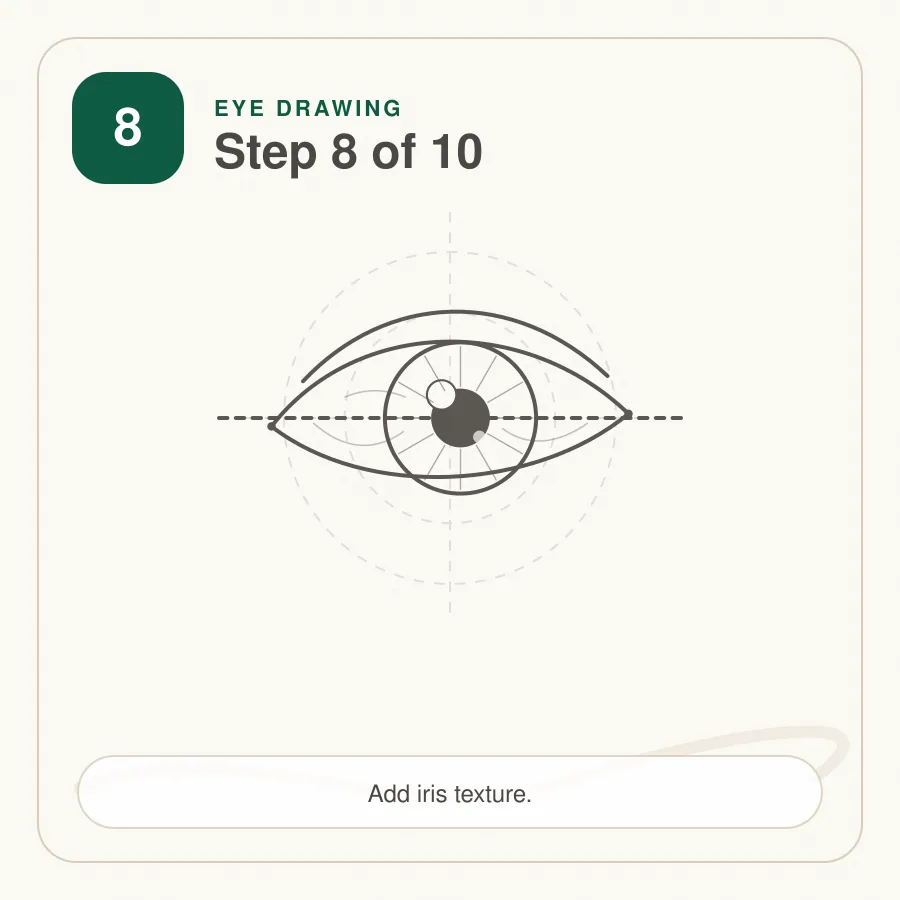
Step 8: Build Iris Texture
Draw short radial strokes from the pupil outward and from the iris rim inward. Vary the pressure so the texture looks organic.
Do not fill the iris with identical spokes. Leave broken lighter areas that can read as reflected light or color variation.
Tip: Keep the pupil darker than the iris texture.
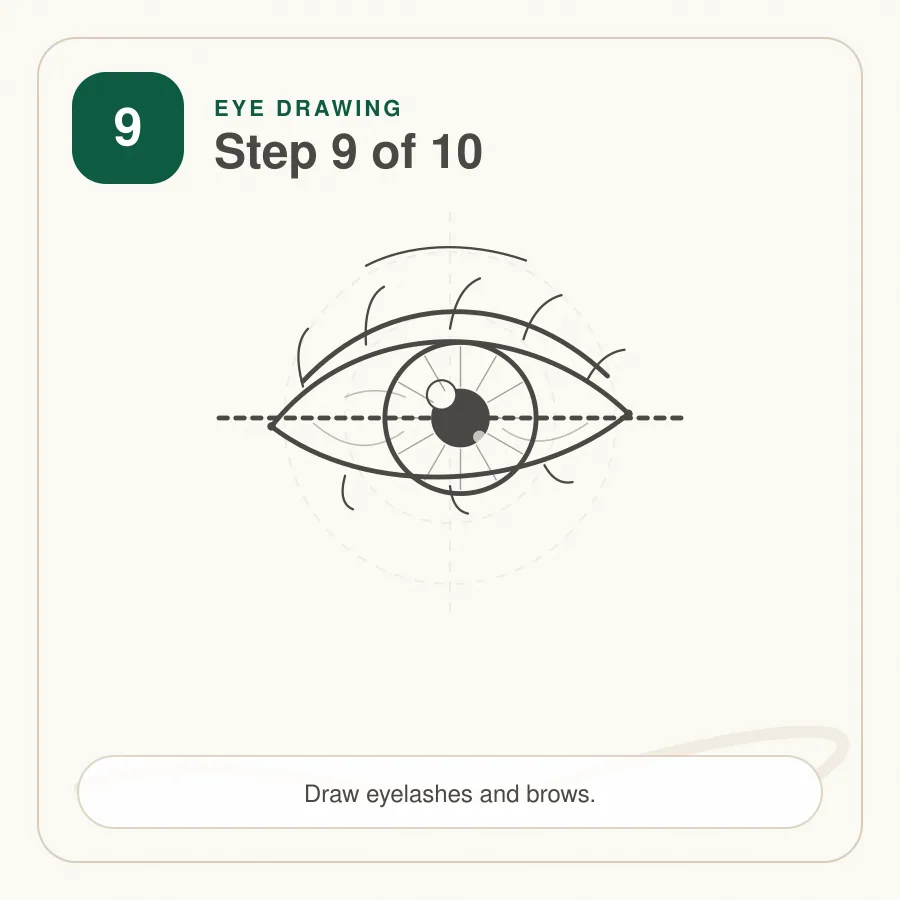
Step 9: Add Lashes and Brow Texture
Draw tapered lashes from the lid edge and place light brow strokes above the crease. Group the lashes instead of spacing them evenly.
Upper lashes curve upward and outward. Lower lashes are usually shorter, lighter, and more widely spaced.
Tip: Curve lashes in the direction they grow.
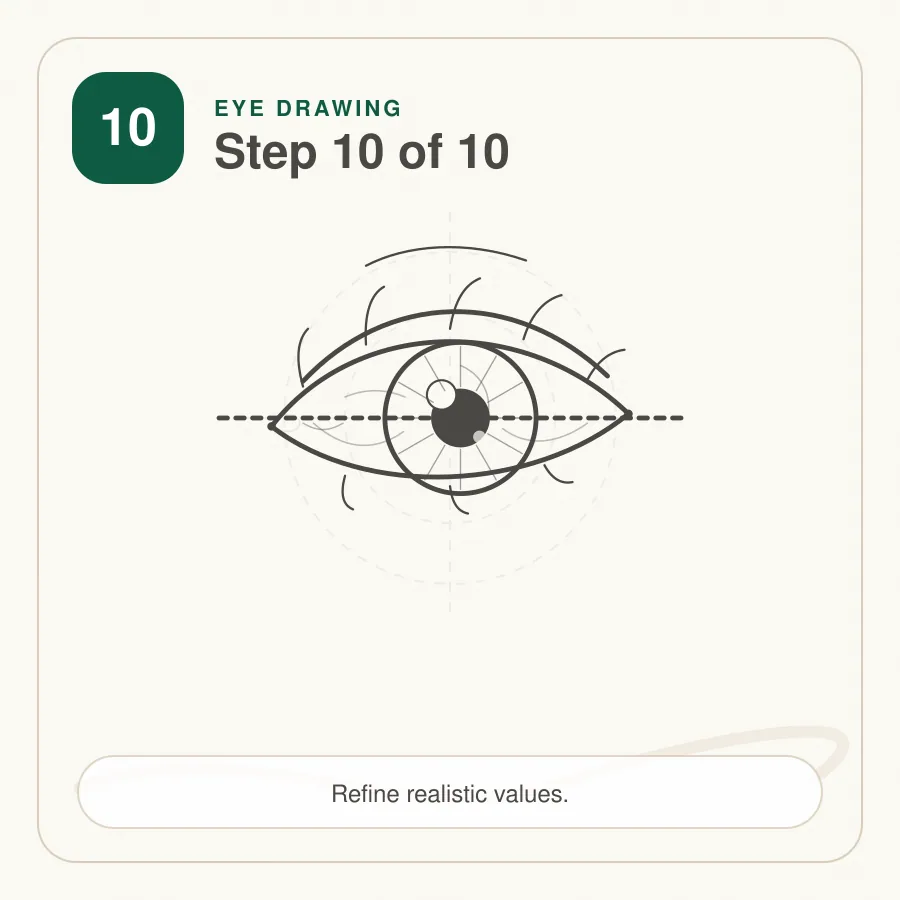
Step 10: Refine the Values
Deepen the pupil, upper lid shadow, iris rim, lash roots, and crease. Soften transitions and lift highlights where needed.
Compare all values before finishing. A realistic eye drawing needs a clear dark pupil, a bright catchlight, and several middle tones between them.
Tip: Compare the darkest dark with the lightest highlight before finishing.
Simple Eye Drawing for Beginners
For a beginner version, reduce the subject to an axis, an almond lid shape, a circle for the iris, a dark pupil, one highlight, and a few lashes. This simple eye drawing still teaches the most important structure without requiring full realism.
Keep the sclera lightly shaded instead of pure white. Even a very simple eye looks more believable when the upper lid casts a small shadow.
Realistic Eye Drawing Step by Step
The realistic method is the same sequence used above: axis, corners, lids, iris, pupil, highlight, crease, eyeball shading, iris texture, lashes, and final value checks. Each stage solves one problem before the next detail is added.
If the result looks flat, return to the early construction. Check whether the lids wrap around the eyeball and whether the iris is partly tucked behind the upper lid.
How to Shade the Iris
The iris needs a dark pupil, a darker outer rim, and varied radial texture. Start with pale strokes, then deepen selected areas instead of making a uniform gray circle.
Leave the catchlight clean. If graphite crosses it, lift the area with a kneaded eraser and sharpen the edge again. For broader value practice, review pencil shading.
How to Draw Eyelashes Naturally
Eyelashes grow from the lid edge in tapered groups. Press slightly at the base, curve outward, and lift the pencil at the tip. This creates a thick root and a fine end.
Avoid drawing lashes as identical spikes. Change their length, spacing, and angle. The longest lashes usually sit near the outer half of the upper lid.
Drawing Different Eye Shapes
Round eyes have more visible iris and a taller lid opening. Almond eyes taper smoothly at both corners. Hooded eyes show a heavier upper fold that may cover much of the crease.
Upturned eyes lift at the outer corner, while downturned eyes slope gently downward. Use the same construction method, but change the axis angle, lid height, and crease position. The proportions guide can help you compare these changes.
Character Drawing Eyes
Character eyes can simplify the anatomy while keeping the same logic. Make the iris larger for a softer expression, simplify the crease, and reduce the number of lashes.
Even stylized eyes benefit from clean line control. If the lid curves feel shaky, practise slow tapered strokes with the line control guide.
Hyper-Realistic Eye Drawing Tips
For a hyper-realistic eye drawing, spend more time on edges and reflected light. The wet lower lid, tiny skin folds, iris fibers, and brow hairs should have different textures.
Use the darkest pencil only after the middle values are correct. If the pupil becomes dark too early, the rest of the eye may be forced into heavy shading.
How to Refine the Final Drawing
Begin refinement by checking the axis and corner height. If one corner is too high or the iris is off center, correct it before adding final lashes.
Clean the lid edges, sharpen the catchlight, and soften the sclera. The white of the eye should contain subtle tone, especially near the upper lid and corners.
Finally, compare the pupil, iris rim, upper lid shadow, crease, and brow. These value relationships create depth.
Shading and Coloring the Eye
A graphite eye can be finished with smooth values, but colored pencils also work. For color, begin with a pale iris base, add darker fibers around the pupil and rim, and keep the highlight untouched.
Skin around the lids should be softer than the iris texture. Blend the eyelid shadow carefully, then redraw the sharpest lash roots over the top.
Common Eye Drawing Mistakes
Drawing a flat almond symbol
The lids should wrap around a sphere. A flat outline makes the eye look like a symbol instead of anatomy.
Making the sclera pure white
The white of the eye still has shadow, especially under the upper lid.
Forgetting lid thickness
Thin single lines around the eye remove the waterline and make the lids look paper flat.
Making every lash identical
Natural lashes vary in length, curve, spacing, and darkness.
Losing the highlight
A clean catchlight is essential for a glossy, realistic finish.
Tips for Drawing Eyes for Beginners
- Start with an axis before drawing the lid shape.
- Place the corners before the iris.
- Keep the iris round even when the lid hides part of it.
- Protect the catchlight from the beginning.
- Shade the upper lid shadow before adding lashes.
- Taper every lash stroke.
- Compare values at the end of the eye drawing process.
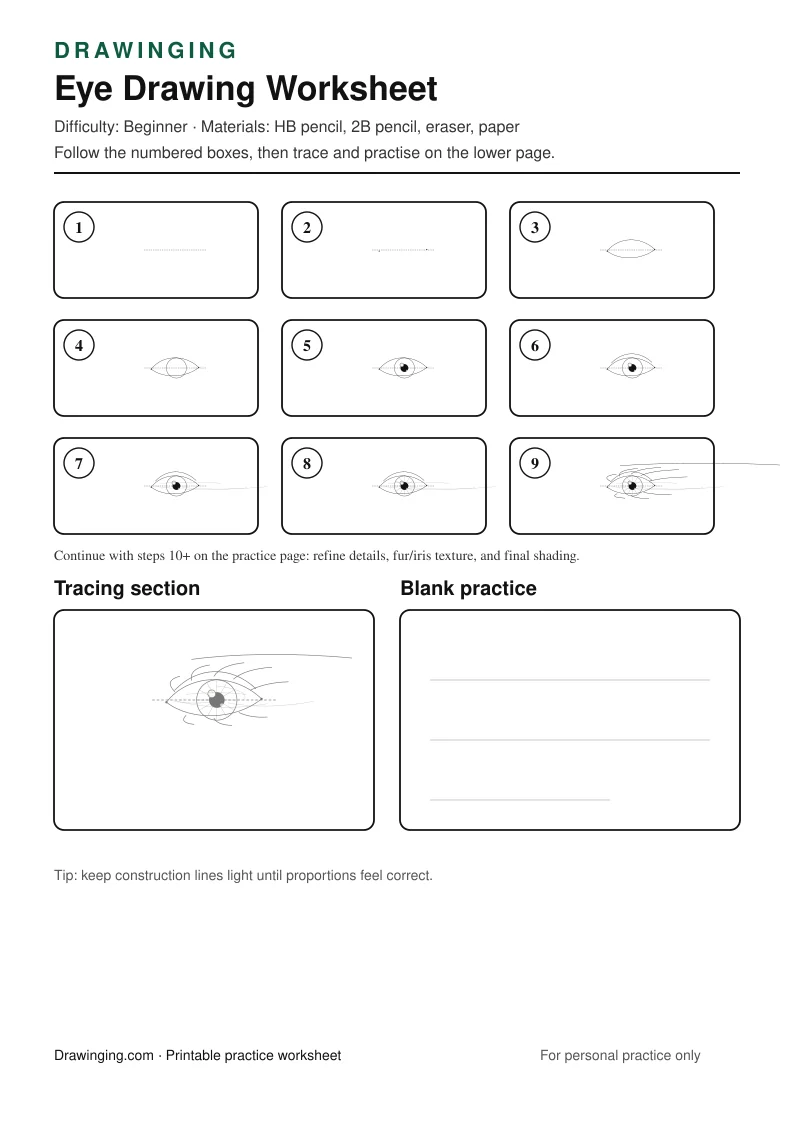
Download the Eye Drawing Worksheet
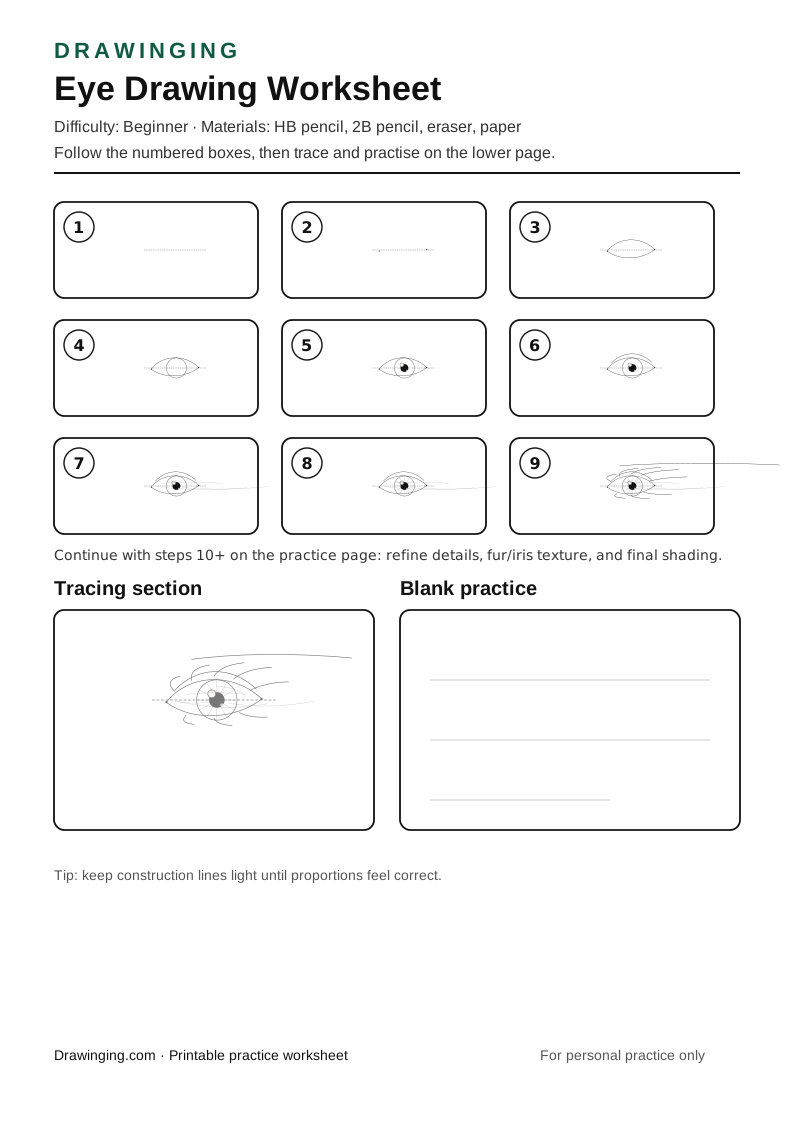
Use the printable worksheet to practise the same ten-step process on paper.
The worksheet includes:
- ten numbered step boxes
- a tracing exercise
- a blank drawing area
- a simple materials reminder
- a finished eye reference
- printer-friendly black lines
Download the Eye Drawing Worksheet PDF
Related Drawing Tutorials
After completing this lesson, continue with tutorials that also depend on proportion, fur, and facial structure:
- Practise cat eyes and fur direction
- Draw a dog face with muzzle structure
- Study a horse head and body
Frequently Asked Questions
How should beginners start a realistic eye sketch?
Begin with a light axis, place the inner and outer corners, then wrap the eyelids around the round eyeball before adding the iris and pupil.
Should the iris be a full circle?
The iris is round, but the upper eyelid often covers part of it. Hiding a small portion usually makes the eye look more natural.
How do I keep the eye from looking flat?
Shade the eyeball as a sphere, darken the upper lid shadow, preserve the catchlight, and use stronger values inside the pupil and iris rim.
How do I draw eyelashes naturally?
Draw lashes in tapered groups that grow from the lid edge. Curve them in different directions instead of making identical spikes.
Which pencils are useful for eye shading?
Use HB for construction, 2B for eyelids and iris texture, and 4B for the pupil, lash roots, and deepest shadows.
Can I print the eye worksheet?
Yes. The worksheet includes ten steps, tracing practice, and a blank space for your own realistic eye study.
Final Thoughts
A convincing eye depends on structure first and detail second. Place the axis, corners, lids, iris, pupil, and highlight carefully before you commit to dark graphite.
Repeat the worksheet until the steps feel familiar. Your next eye drawing can explore a different lid shape, gaze direction, brow texture, or lighting setup.